Roast paan, also known as “Thati paan” in Sinhalese, is a Sri Lankan bread.
This Sri Lankan bread is a term that refers to this toasted or roasted bread, typically enjoyed with a variety of accompaniments.

Popular for its crust, extra crispy texture and flat shape, this type of bread is made by local bakeries.
If you’ve been wanting to make roast paan at home, then this step-by-step guide should help you make the best bakery-style roast paan right at home.
What to serve with roast paan.
- 3 Sri Lankan menus with roast paan.
- Serve with Sri Lankan Dhal curry(parippu, dal, daal).
- pol sambol(Sri Lankan Coconut Sambol).
- As an optional dish, add a Sri Lankan spicy Dry Potato curry(ala theldala).
- Serve with a creamy potato curry, seeni sambol, and some fried eggs, omelette or scrambled eggs.
- Serve with egg curry, spicy coconut sambol and a lunumiris.
- Meat, chicken and seafood curries can be served with roast paan.
- Ideal for making any type of panini and sandwiches.
- Make grilled cheese sandwiches.
- Pol sambol stuffed sandwiches.
- Shredded beef and cheese sandwiches.
- Seeni sambol and hard-boiled egg sandwiches.
- Spicy eggs and cheese roast paan sandwich.

Tips & questions for roast paan bread.
- Tips.
- Make sure the yeast you use is fresh, not expired.
- Although you can add the yeast directly to the flour, activate the yeast separately to make sure it is fresh.
- Adding flour while kneading.
- While kneading, make sure to only add the amount of extra flour mentioned in the recipe, if possible, even less.
- If you add more flour, the water-to-flour ratio of the bread will be disrupted. The result would be a dry, dense bread.
- Kneading the dough.
- Always work the dough with a light coating of flour on your hands and the surface of the kneading area.Try not to knead the dough vigorously, but find a rhythm that results in a smooth ball at the end.
- Depending on how cold or hot the day is, you might have to knead longer to get the proper smoothness before the first rise.
- On a warm, sunny day, it takes me just 7 minutes, but if it’s raining or gloomy, it takes me 10 to 12 minutes.
- Frequently press on the dough with a floured fingertip to check if the dough is kneaded enough. If the indentation stays, continue kneading.
- If the dough springs back to its original shape, then your dough is kneaded and ready.
- The first rise.
- Although I have given a time frame, you need to keep an eye on the dough.
- There should be roughly a 40% rise in the dough. Again, due to cold weather, you might have to keep an extra 30 minutes to get that 40% rise.
- So, check on the dough to make a calculated guess that the first rise is done.
- Shaping the dough.
- Roll them into smooth balls before shaping them.
- They need to be covered so they don’t dry out as you work each ball to its final shape.
- The loaf pan.
- I’ve used an 8″ regular loaf pan. You’ll notice from the images how many shaped dough pieces can be placed in the pan according to how you place them.
- Apply the flour and oil paste inside the bottom of the pan and on each of the shaped flatbreads.
- This helps with the bread sliding off the pan as well as separating them individually later.

- Questions.
- Is there a learning curve involved in making this bread?
- If you’ve never kneaded or shaped bread before, then yes.
- The learning would involve being comfortable and relaxed when kneading the dough and knowing when the dough is ready to go through the first proofing.
- The shaping of the dough into the required shape also takes a little time to learn.
- While making this Sri Lankan bread, what areas of the process should I be careful and pay attention to?
- Adding flour while kneading the dough.
- Knowing how long to knead and sticking to a consistent movement of kneading(folding, rolling, repeating).
- Time of proofing(rising). Stick to the recommended times mentioned here. shaping the bread.
- How long does it take to make roast paan?
- Here’s the breakdown of each step of the bread-making (refer to tips for further info on the time).
- Gather all ingredients and set up a space.10 minutes.
- Mixing of ingredients. 3-5 minutes.
- Hydrating the mixed dough.15 minutes.
- Kneading for the first proofing. 12-15 minutes.
- The first proofing. 1 hour and 30 minutes.
- The final shaping is placing the dough in a loaf pan. 20-30 minutes(guessing here).
- Final proofing. 35 minutes.
- Baking time.30-40 minutes, depending on your oven.
- Grill bread to make it crispy, 15 minutes on each side.
- Here’s the breakdown of each step of the bread-making (refer to tips for further info on the time).
- How long does the freshness of the bread last?
- I would recommend consuming the bread within 24 hours.
- Roast paan tends to become hard the longer it stays out.
- You can warm the bread for 10-15 seconds while spraying a little water on it to bring it back to its original crispy softness.
- Is there a learning curve involved in making this bread?

Workflow for roast paan bread
- Have all the ingredients and utensils you need to make the bread ready.
- Measure the ingredients so you can work seamlessly at each stage.
- Activate the yeast as per instructions in the recipe. set aside.
- In a separate bowl, combine the dry ingredients.
- Once the yeast is activated, add the suggested amount of water and yeast gradually to hydrate the flour.
- Mix lightly, cover and set aside for 15 minutes.
- Oil a large bowl and set aside.
- Transfer the wet dough onto a flat surface and knead until you have a smooth dough ball.
- Place in a bowl, cover(important), and set aside for 1 hr and 30 minutes(refer to tips on this).
- Prepare the flour and oil mixture and set aside.
- While the dough rises, prepare the loaf pan as per recipe instructions. set aside.
- Once the first rise is over, press down the dough and transfer it to a floured surface.
- Separate the dough and make individual dough balls. Cover and set aside for 10 minutes.
- Shape each dough ball into a long, triangular or box-shaped flatbread.
- While placing each shaped flatbread inside the loaf pan, brush the flour oil mixture between the flatbreads.
- Cover with a dome-shaped bowl or cloth and leave the bread for the second rise.
- Preheat the oven.
- Place the loaf in the oven with an oven-proof cup filled with water.
- Bake the bread.
- Once baked, remove them from the oven, and separate the roast paan(bread).
- Place them on the pan, brush some butter over the flat side of the bread and grill/broil for 15 minutes on each side.
What you will need in the kitchen.
- Measuring cups and measuring spoons.
- 2 cups
- Clean, clutter-free surface to knead the dough.
- 2 large bowls
- 1 small bowl
- Large platter
- Cling film or a clean cloth
- Baking paper or parchment paper
- 8″ loaf pan
- Oven-proof dish or small bowl.
- oven mittens.
- Pastry or basting brush
More Sri Lankan recipes.
- Sri Lankan kibula banis(sugar-coated buns).
- fish rolls(Chinese rolls).
- fish cutlets(Sri Lankan).
- vegetable roti(elawalu roti)
- Sri Lankan paratha(godamba)roti.
- How to make Sri Lankan egg roti/paratha.
- Sri Lankan adukku roti(chicken-crepes layered pies).
- Deep fried-curried fish patties(Sri Lankan).
RECIPE DIFFICULTY-MORE CARE IS NEEDED.
Ingredients to make roast paan.
The ingredients mentioned below use standard measuring cups and spoons.
- Flour
- Salt
- Active yeast
- Sugar to activate the yeast
- Water
- Oil
- Ingredients to make the flour and oil mix
- Flour
- Oil
- Butter to toast the sides of the bread.
- Ingredients to make the flour and oil mix
How to make the roast paan(thati paan).
Warm water for 15 seconds in your microwave or on a stovetop.
Add the teaspoons of sugar, and dissolve.
Add the teaspoons of yeast to the water. Mix with a spoon, cover and let the yeast bloom.
This should take 3-5 minutes.
The yeast mixture should be frothy, which shows the yeast is well and active.
While the yeast activates, follow the next step.

Add the flour into a bowl, followed by salt.
Combine well with a spoon for 10 seconds.
Check on your yeast, when it’s frothy, follow the next step.
To the flour, gradually add a cup of water and mix with a spoon for a few seconds.
Add the frothy yeast mixture to the flour and lightly combine for 10 seconds.
Add teaspoons of oil.
If you notice the flour is still dry, add 2-3 tablespoons of water to hydrate the flour mixture.
Use your fingertips to lightly press and combine the flour mix.
Cover and leave for approximately 15 minutes.

How to prepare the dough to knead.
Lightly oil a bowl. set aside.
Use extra flour throughout the kneading to sprinkle over the board and flour your hands and the wet dough.
Once 15 minutes of hydration are over, gently add the semi-wet dough onto the board.
Use your fingertips to lightly press and spread the dough.
Sprinkle some flour over the dough mix.
Lightly flour your hands and begin your kneading of the dough.

Use a folding and rolling motion to knead the dough.
You will have to add flour to knead the dough and flour your hands from time to time.
7 to10 minutes of gentle but firm kneading(refer to tips on kneading)will turn your dough firm and smooth.
Press a floured fingertip on the dough; if it bounces back, your dough is ready for its first rise.
Lightly flour the dough ball. Place the dough in the oiled bowl.

Cover with clingfilm or a cloth serviette, set aside in a warm place to proof for 1 hour and 30 minutes.
While the dough rises, prepare the oil-flour mix and loaf pan.
The flour-oil mix for the bread.
Add a few tablespoons of flour and tablespoons of oil into a bowl.
Mix until you have a smooth and loose paste. set aside.

Cover the bottom of the loaf pan with parchment/baking paper.
Brush the oil-flour mix generously, cover to avoid drying and set aside.

Once the proofing(rising)is done, gently press down on the dough to deflate it.

Flour the kneading surface and transfer the dough onto the board.
Gently roll the dough into a firm ball.

Cut the dough in half and then into four.
For long rectangular roast bread, cut into four.
For box-shaped roast bread, cut it into eight.
Roll them into smooth balls and immediately place them on a platter and cover them.

Dough shaping and placing in the loaf pan.
Place the loaf pan in front of you so you can judge the size you want to roll the dough into.


Use your rolling pin to make a flat oval shape that is thicker in the middle.
Use the image below as a guide.


Fold the oval-shaped dough to make a half-moon shape and pinch the edges(refer to the image below).
Use your rolling pin to straighten the curved edges to fit the loaf pan(refer to the image below).


Brush the loaf pan side again with the oil and flour mix and place the first shaped dough.
Brush the paste on the dough facing up.
Rest the loaf pan on its side; this makes it easy to layer the shaped dough on each other.
Then continue to brush the flour-oil mix in between the shaped dough as you layer them on the pan.


Right the pan to its standing position, and you’ll notice a gap.
This gap should be adjusted for the bread to rise.
We do this by just adjusting the shaped dough to fit the pan while giving space in between to expand.
Just go between the dough pieces, holding them like clothing to be hung on a line and adjust.


Cover with a large domed bowl or a kitchen towel and let it rise for the second time for 30 minutes.
Preheat oven to 200 °C.
Place the loaf pan in the oven and add an oven-proof dish filled with water.
You can use a foil or aluminium cup for this purpose.


Bake the bread for 30 minutes at 200 °C.

Once the bread is baked, gently invert the bread onto a platter using oven mittens.
Spread them on the baking pan and brush some butter on one side of the bread.
Use the grill mode for 13 to 15 minutes to brown the bread on one side.
Do the same on the other side.


Remove the toasted flatbreads and serve while warm. Serving ideas are given above.


JOIN ME ON ISLANDSMILE YOUTUBE CHANNEL
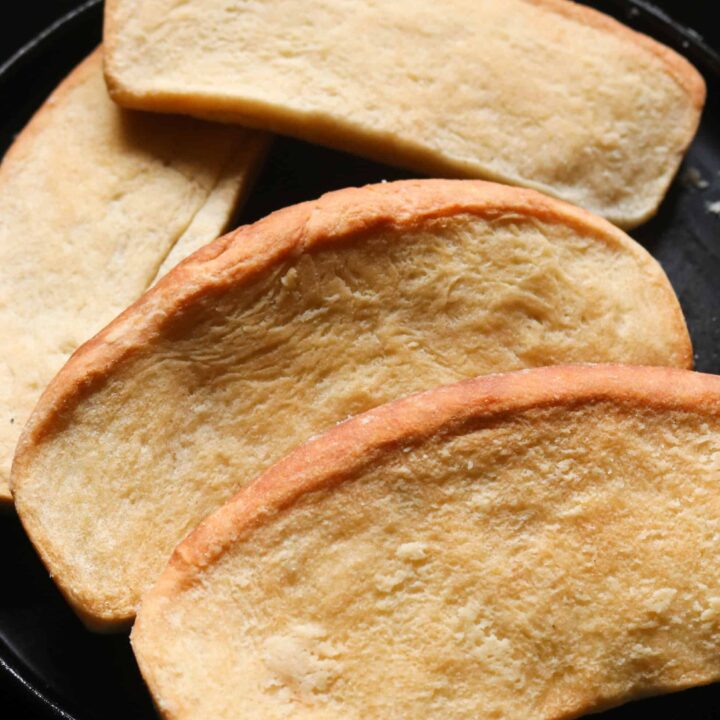
Sri Lankan roast paan(Bread recipe)).
Roast paan also known as “Thati paan” in Sinhalese is a Sri Lankan bread variety.
Popular for its crust, extra crispy texture and flat shape, this type of bread is made by local bakeries.
Ingredients
- Ingredients to make roast paan.
- 2 and 1/2 cups of flour
- 1/2 teaspoon of salt
- 1/4 cup of water(to activate the yeast)
- 2 teaspoons of sugar
- 2 teaspoons of active yeast
- 1 cup of water + 2 tablespoons of water
- 2 and 1/4 teaspoon of oil to be used as needed(to oil the bowl and add to the dough mix).
- 1/2 a cup of flour to help with the kneading
- Ingredients to make the flour and oil mix
- 3 tablespoons of flour
- 4 tablespoons of oil
- 3 tablespoons of butter to toast the sides of the bread.
Instructions
- Warm 1/4 cup of water for 15 seconds in your microwave.
- Add 2 teaspoons of sugar, and dissolve.
- Add 2 teaspoons of yeast to the water. Mix with a spoon, cover and let the yeast bloom.
- This should take 3-5 minutes.
- The yeast mixture should be frothy, which shows the yeast is well and active.
- While the yeast activates, follow the next step.
- Add 2 and 1/2 cups of flour into a bowl, followed by salt(1/2 teaspoon).
- Combine well with a spoon for 10 seconds.
- Check on your yeast; when it’s frothy, follow the next step.
- To the flour, gradually add 1 cup of water and mix with a spoon for a few seconds.
- Add the frothy yeast mixture to the flour and lightly combine for 10 seconds.
- Add 2 teaspoons of oil.
- If you notice the flour is still dry, add 2-3 tablespoons of water to hydrate the flour mixture.
- Use your fingertips to lightly press and combine the flour mix.
- Cover and leave for approximately 15 minutes.
How to prepare the dough to knead.
- Lightly oil a bowl(1/4 teaspoon). set aside.
Use the extra flour(1/2 a cup)throughout the kneading to sprinkle over the board and flour your hands and the wet dough.
- Once 15 minutes of hydration are over, gently add the semi-wet dough onto the board.
- Use your fingertips to lightly press and spread the dough.
- Sprinkle some flour over the dough mix.
- Lightly flour your hands and begin your kneading of the dough.
- Use a folding and rolling motion to knead the dough.
- You will have to add flour to knead the dough and flour your hands from time to time.
- 7-10 minutes of gentle but firm kneading(refer to tips on kneading)will turn your dough firm and smooth.
- Press a floured fingertip on the dough; if it bounces back, your dough is ready for its first rise.
- Lightly flour the dough ball. Place the dough in the oiled bowl.
- Cover with clingfilm or a cloth serviette, set aside in a warm place to proof for 1 hour and 30 minutes.
- While the dough rises, prepare the oil-flour mix and loaf pan.
How to make the flour and oil mix.
- Add 3 tablespoons of flour and four tablespoons of oil into a bowl.
- Mix until you have a smooth and loose paste. set aside.
- Cover the bottom of the loaf pan with parchment/baking paper.
- Brush the oil-flour mix generously, cover to avoid drying and set aside.
- Once the proofing(rising)is done, gently press down on the dough to deflate it.
- Flour the kneading surface and transfer the dough onto the board.
- Gently roll the dough into a firm ball.
- Cut the dough in half and then into four.
For a boxed shape roast bread, cut into eight.
- Roll them into smooth balls and immediately place them on a platter and cover them.
Turning the dough balls into the final shape.
- Place the loaf pan in front of you so you can judge the size you want to roll the dough into.
- Use your rolling pin to make a flat oval shape that is thicker in the middle. Use the image below as a guide.
- Fold the oval-shaped dough to make a half-moon shape and pinch the edges(refer to the image below)
- Use your rolling pin to straighten the curved edges to fit the loaf pan(refer to the image below)
- Brush the loaf pan side again with the oil and flour mix and place the first shaped dough.
- Brush the paste on the dough facing up.
- Rest the loaf pan on its side; this makes it easy to layer the shaped dough on each other
- Then continue to brush the flour-oil mix in between the shaped dough as you layer them on the pan.
- Right the pan to its standing position, you’ll notice a gap; this gap should be adjusted for the bread to rise.
- We do this by just adjusting the shaped dough to fit the pan while giving space in between to expand.
- Just go between the dough pieces, holding them like clothing to be hung on a line and adjust.
- Cover with a large domed bowl or a kitchen towel and let it rise for the second time for 30 minutes.
- Preheat oven to 200°C.
- Place the loaf pan in the oven and add an oven-proof dish filled with water. You can use a foil or aluminium cup for this purpose.
- Bake the bread for 30 minutes at 200°C.
- Once the bread is baked, gently invert the bread onto a platter using oven mittens.
- Spread them on the baking pan and brush some butter on one side of the bread.
- Use the grill mode for 13-15 minutes to brown the bread on one side. Do the same on the other side.
- Remove the toasted flatbreads and serve while warm. Serving ideas are given above.
Recommended Products
As an Amazon Associate and member of other affiliate programs, I earn from qualifying purchases.
-
 Spring Chef Magnetic Measuring Spoons Set, Dual Sided, Stainless Steel, Fits in Spice Jars, Black, Set of 8
 -
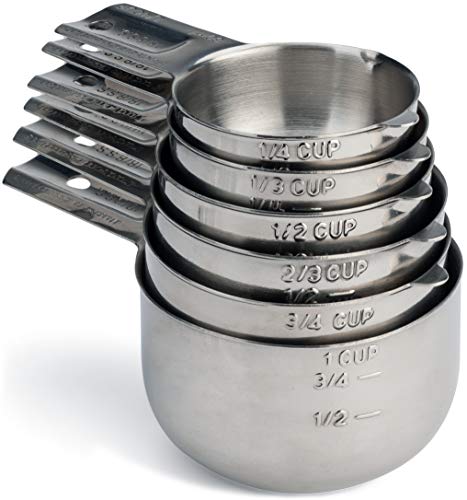 Hudson Essentials Stainless Steel Measuring Cups Set - 6 Piece Stackable Set with Spout
 -
 Basting Brush Silicone Heat Resistant Pastry Brushes Spread Oil Butter Sauce Marinades for BBQ Grill Barbecue Baking Kitchen Cooking, Baste Pastries Cakes Meat Desserts, Dishwasher safe, Set of 4
 -
 Bamboo Cutting Board Set with Juice Groove (3 Pieces) - Wood Cutting Boards for Kitchen, Wood Cutting Board Set, Kitchen Chopping Board for Meat (Butcher Block) Cheese and Vegetables
 -
 KIZEN Digital Meat Thermometer with Probe - Waterproof, Kitchen Instant Read Food Thermometer for Cooking, Baking, Liquids, Candy, Grilling BBQ & Air Fryer - Black/White
 -
 Kitchen Shears, iBayam Kitchen Scissors Heavy Duty Meat Scissors Poultry Shears, Dishwasher Safe Food Cooking Scissors All Purpose Stainless Steel Utility Scissors, 2-Pack (Black Red, Black Gray)
 -
 Chef Knife PAUDIN N1 8 inch Kitchen Knife, German High Carbon Stainless Steel Sharp Knife, Professional Meat Knife with Ergonomic Handle and Gift Box for Family & Restaurant
 -
 Pyrex Prepware 1-1/2-Quart Glass Mixing Bowl
 -
 Non-slip Silicone Pastry Mat Extra Large with Measurements 28''By 20'' for Silicone Baking Mat, Counter Mat, Dough Rolling Mat,Oven Liner,Fondant/Pie Crust Mat By Folksy Super Kitchen Red
 -
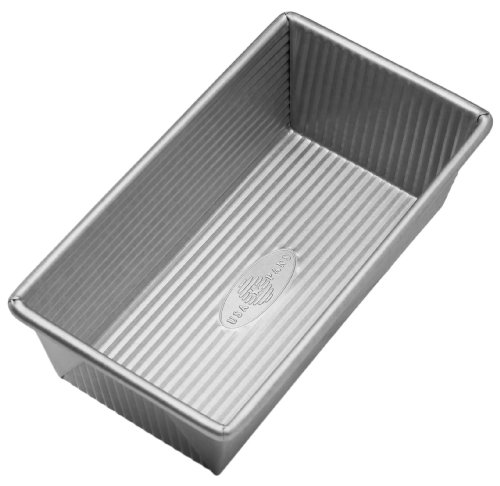 USA Pan Bakeware Aluminized Steel Loaf Pan, 1 Pound, Silver
 -
 Humbee Chef Serrated Bread Knife For Home Kitchens Bread Knife 10 Inch Black
 -
 OXO Good Grips Etched Ginger & Garlic Grater, Green,us:one size
Nutrition Information:
Yield: 4 Serving Size: 1Amount Per Serving: Calories: 589Total Fat: 28gSaturated Fat: 7gTrans Fat: 0gUnsaturated Fat: 19gCholesterol: 23mgSodium: 404mgCarbohydrates: 74gFiber: 3gSugar: 3gProtein: 11g
Nutrition facts are an estimate and not guaranteed to be accurate. Please see a registered dietitian for special diet advice.
Each recipe on this blog has been written with great care and love to the best of my ability, with you in mind.
It’s free and on the blog for you to try anytime.
All I ask is that you do not save it on any apps, recipe boxes, or online groups, which will affect me as a food blogger and the growth of this blog.
I would appreciate it if you shared the link rather than the full recipe.
All images and text on this website are protected by copyright.