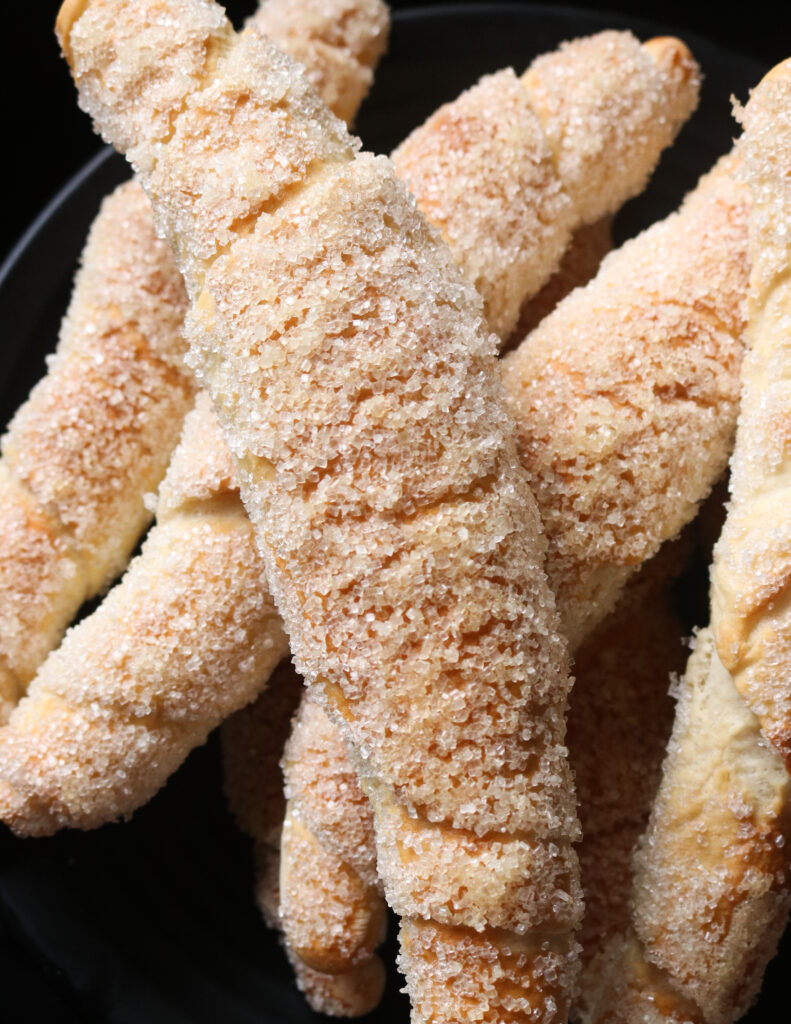
kibula banis recipe with step-by-step instructions to help you make these buns right at home.
These buns are very popular with kids and adults alike.
You can serve these sugar-coated buns for breakfast or as a tea-time snack.
In Sinhalese, we call these, “kibula banis” which means crocodile.
This can be a reference to the shape of the bun once they are baked.
How to serve kibula banis.
- Serve with a cup of milk tea or plain/ginger tea.
- Avoid adding sugar to the tea as the bun has a coating of heavy sugar.
- As a quick breakfast in the morning. for my kids, I cut the buns into 3, set them on a plate and leave the butter, jam, honey or Nutella so they can spread them on the edges to eat.
- And then you have the weird combo of dipping the kimbula banis into ketchup or sriracha sauce mixed with mayonnaise.
Yes, it works, or so my kids say. - I have also used the kibula banis to make my breakfast bread pudding.
- When using these buns to make the pudding, make sure to dust off the sugar as much as possible or cover it with foil when you notice the bread pudding turning too dark on the top.
Save the recipe to Pinterest
Tips for the best kibula banis
- You will need a clutter-free, dry flat surface to knead. your countertop should do but if you want to contain the mess of a floured surface, use a large wooden chopping board.
- The summarized steps to making kimbula banis are as follows.
- Activate the yeast.
- Mix all the ingredients(including yeast).
- Let the dough mixture rest for 15 minutes(covered).
- Turn the dough onto a floured surface and knead until a smooth firm dough ball can be formed.
- Cover and let the dough rise.
- Punch down the dough, turn it onto a floured surface, reshape it into a large dough ball quickly then divide it into smaller portioned balls.
- Shape each ball into its final shape.
- Leave the shaped kibula banis to rise.
- Prepare the sugar syrup to coat the kibula banis.
- Preheat the oven.
- Coat the buns with sugar syrup and then sugar crystals.
- Bake them.
- Make sure to measure the ingredients and have them ready.
- Have all the utensils, bowls and equipment needed close to you before you begin.
- Activating the yeast.
- Check the expiry date of the yeast. This is one of the reasons I activate the yeast separately before adding it to the flour.
- Temperature to activate yeast is important, if the water is too hot you will kill the yeast. Water should be warm to the touch.
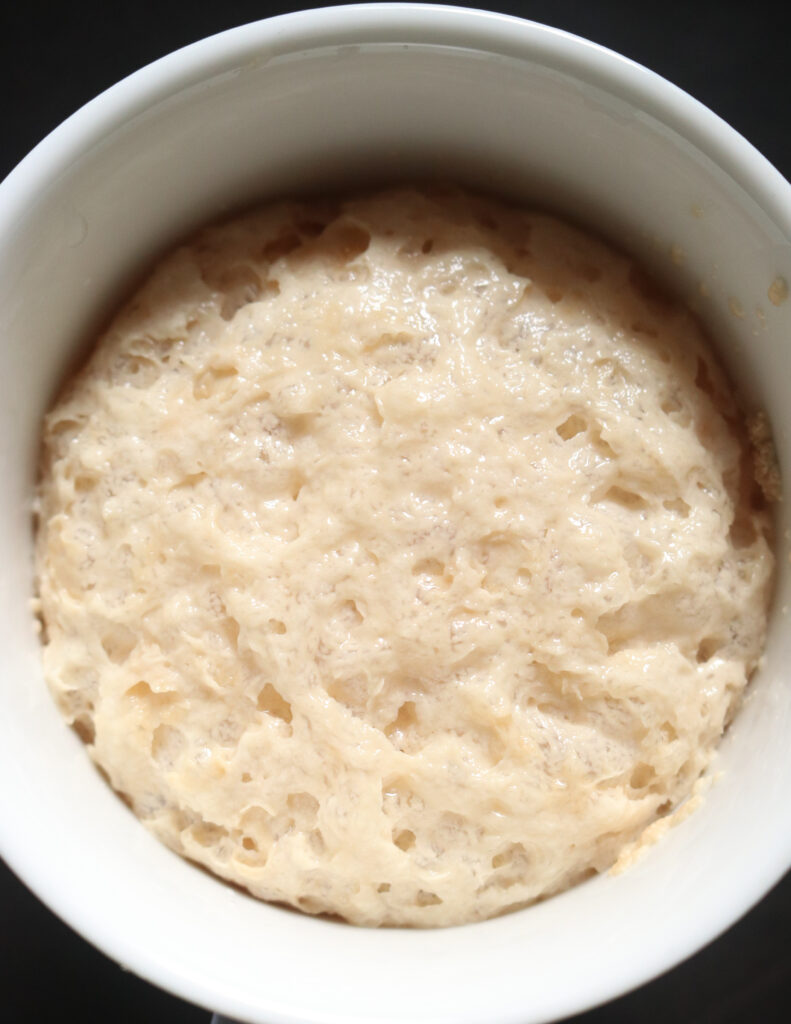
- When properly done, your activated yeast should be frothy and slightly risen. I have added an image below to the instructions.
- Check the expiry date of the yeast. This is one of the reasons I activate the yeast separately before adding it to the flour.
- Add water to the dough.
- Add water gradually, and avoid dumping the water at once.
- Adding water will help to hydrate the dough and make a somewhat wet dough.
- Signs of a properly kneaded dough.
- If you’ve kneaded your dough properly, the dough ball will hold its shape.
- Have a smooth surface when pressed with a floured finger, the surface will smooth out and bounce back.
- Depending on certain factors your kneading time can turn out to be 7-15 minutes.
- For example, if you are making the kibula banis on a fairly sunny, warm day it might take you 7-10 minutes.
- If it’s a rainy day with a cold temperature around your kitchen, you might have to knead for more than 15 minutes.
- Shaping of the kibula banis.
- You might have noticed these elongated buns seem to have some similarities to croissants. Especially the way they are rolled out.
- I’m sure you can use the same method of shaping the dough as the croissant which is to roll them out in one long dough sheet and cut them into triangles and shape them.
- I have rolled them out individually. Personally, I find this method lets me practice and replicate a bakery-style kibula banis.
- At first, rolling them out to a rough triangle might seem difficult but as you make each individual one, they become easy and you’ll instinctively know how to work and roll out the shapes after a few tries.

- Always keep the dough balls covered with cling film.
- Even while shaping each dough ball, the rest should be covered.
- Once they are shaped and ready for the second rising, cover them with a clean kitchen towel.
- My personal note to beginners.
- Making these buns does take time as there are multiple steps involved.
- If this is your first time making kimbula banis, I would suggest first reading through the whole recipe post. I have added as much detail as possible for you to get it right the first time.
- But please don’t be discouraged if you don’t reach the correct texture at first. if you managed to get an edible bun then you’ve done well.
Sri Lankan savoury to try.
- Homemade bakery-style Srilankan fish buns(Maalu paan).
- Sri Lankan adukku roti(chicken-crepes layered pies).
- fish rolls(Chinese rolls).
- fish cutlets(Sri Lankan).
- Deep fried-curried fish patties(Sri Lankan).
- coconut milk pancakes with jaggery filling(pani pol).
- Maggi instant noodle chicken nuggets.
RECIPE DIFFICULTY- EXTRA CARE NEEDED
Utensils and appliances needed.
- Measuring cups and spoons.
- A microwavable cup.
- Clutter-free surface to knead the dough or a large wooden board.
- Large bowl to let the dough rise.
- Cling film or a clean cloth to cover the bowl and let the dough rise.
- 2 Large trays( keep the dough balls and place the shaped buns to rise)
- A small microwavable bowl to make the sugar syrup.
- A pastry brush.
- A flat plate or platter to add sugar.
- Baking paper and baking tray.
- A small oven-proof dish to hold water and create steam in the oven as the buns bake. Since I have a small convection oven, I used a disposable foil cup to hold water.
Ingredients to make kibula banis
The ingredients mentioned below use standard measuring cups and spoons
1 cup of water (1/4 cup of water to be used to activate the yeast and rest to mix the dough)
3 teaspoons of sugar
2 and 1/4 teaspoon yeast
To make the dough
2 and 1/2 cups of flour(or wheat flour as mentioned on the packaging)
1/2 cup extra flour(to be used as needed, to flour your hands, the kneading surface or to sprinkle over the dough, not)
2 teaspoons of salt
3 teaspoons of butter
1/4 cup of fresh milk(substitute with 3 tablespoons of milk powder)
making bakery-style kibula banis
Activate the yeast.
Separate 1/4 cup of water from the cup of water needed to mix the dough.
Microwave the 1/4 cup of water for 12 seconds.
Water should be tepid(slightly warm, refer to tips above). You can heat the water over a stovetop as well.
Add sugar and mix to dissolve it, add the recommended yeast amount, stir and cover. Set aside for 3-5 minutes.
If your yeast is fresh when activated should look like the below image.
While the yeast activates, you can mix the dough ingredients in a separate bowl.
mixing the dough for kibula banis.
To a large bowl, add flour and salt. combine them for a few seconds.
Add butter and milk.
By now, your yeast should be ready. Add the yeast mixture to the flour mix.
Mix the dough with your hand while gradually adding the rest of the remaining water.
Make sure to incorporate all the ingredients together, scraping off any flour that is left around the bowl.
If you feel the dough is not hydrated or rather dry, add water in tablespoons(about two).
Once you have the dough mixed, cover with a kitchen towel or lid for 15 minutes and let the dough mixture rest.
While the dough mixture rest, prepare your floured surface to knead the dough.
How to knead the dough.
Once you have a lightly floured surface prepared, transfer the dough mix onto it.
Dust some flour onto your hand as well as on top of your dough.
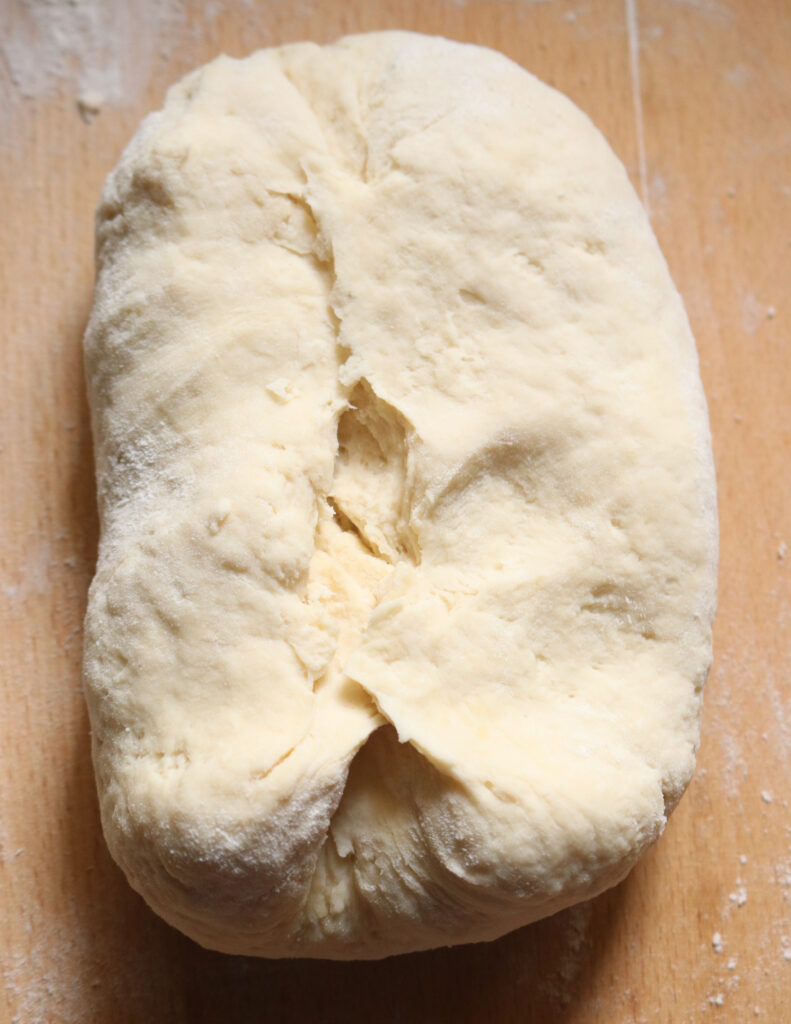
Roughly shape as below. Don’t spend too much time doing this, all you need is a roughly shaped dough which can be folded inward towards the middle of the dough.
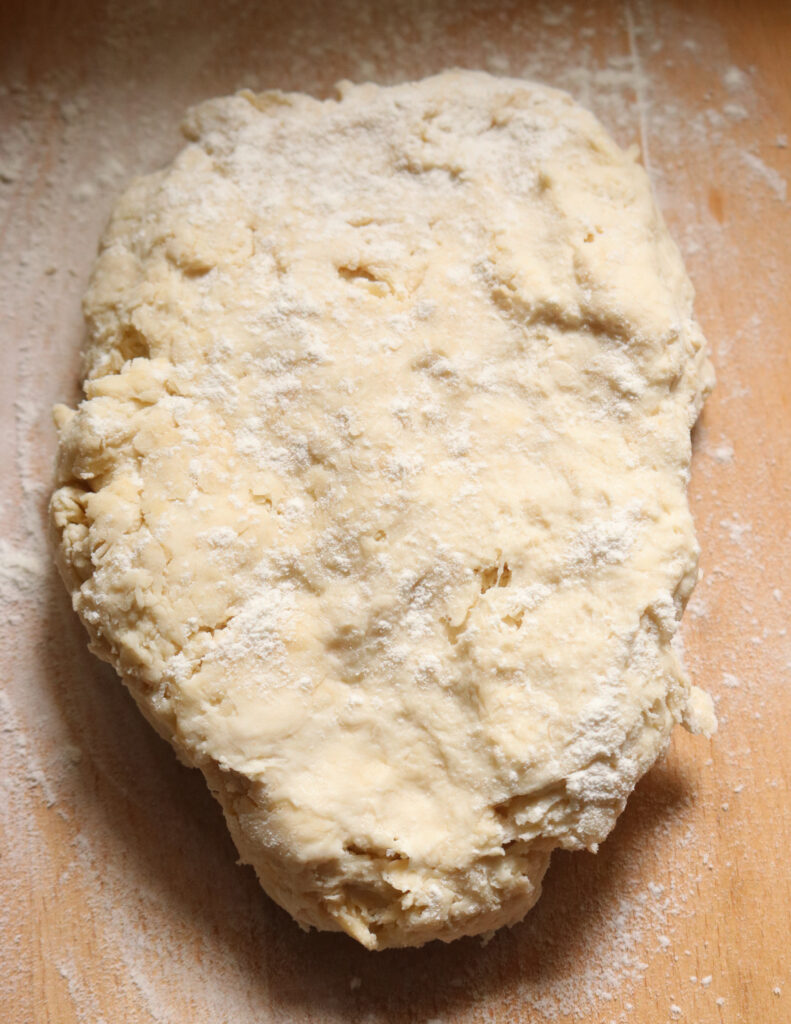
Fold the top half of the dough to the centre and then gently roll it towards you.
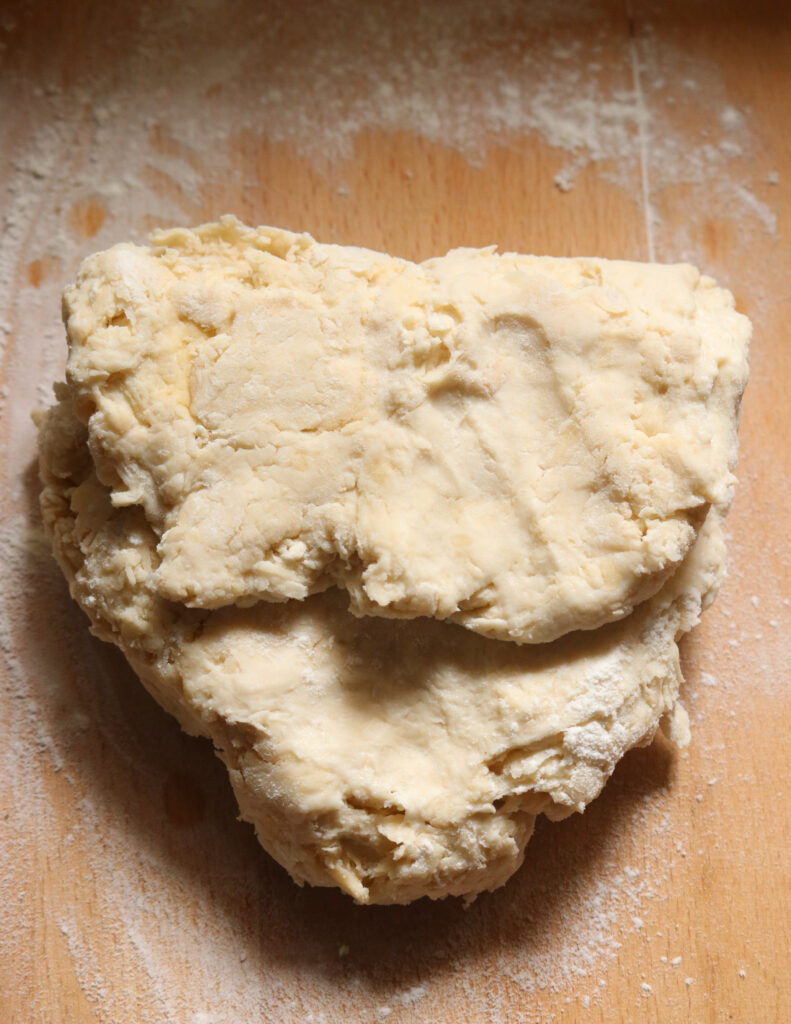
Position the dough vertically.
Fold the top part to its centre again and roll it towards you.
Repeat the process of folding, and rolling the dough.
This is basically the kneading movements you will be using repeatedly.
Dust your hands as well as the surface you are kneading with flour.
Make sure you are kneading the dough gently and without much force.
I like to remind myself that I’m gently massaging the dough with the right amount of pressure at this point.
As you knead, you’ll notice, that you are using more of the heel of your palm and finger-like handles(for want of a better term)to knead and move the dough.
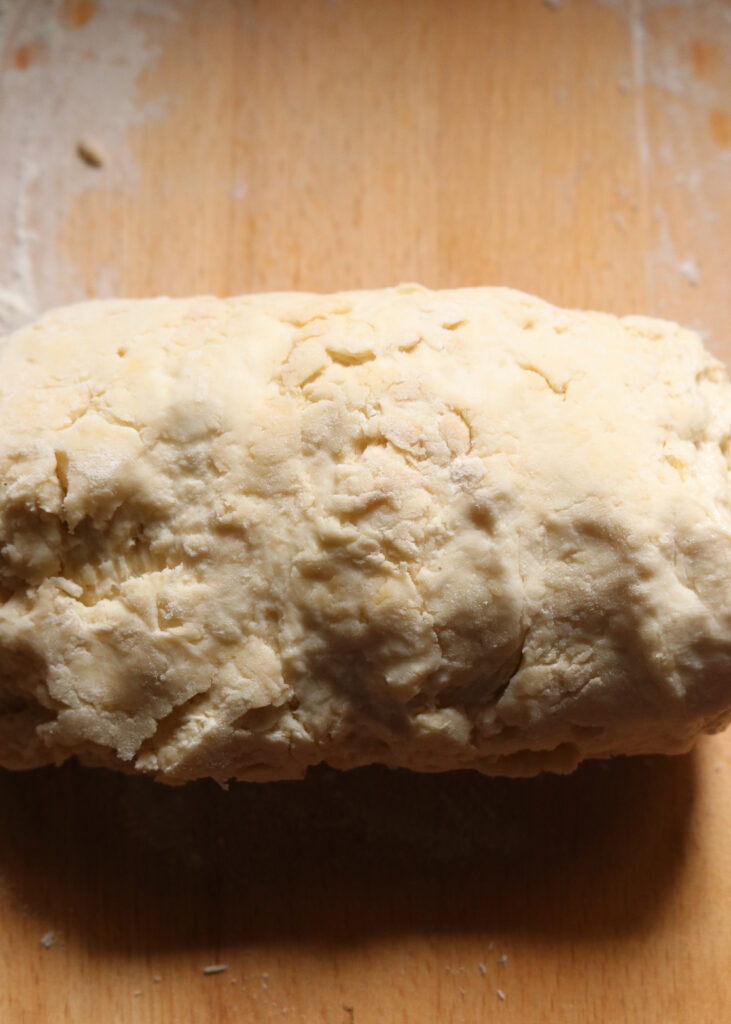
As you repeat the gentle folding, and rolling motions you’ll feel the dough smoothing out.
You will also notice a seam forming on the underside of the dough where you fold and roll out the dough.
Make sure not to break into this middle seam.
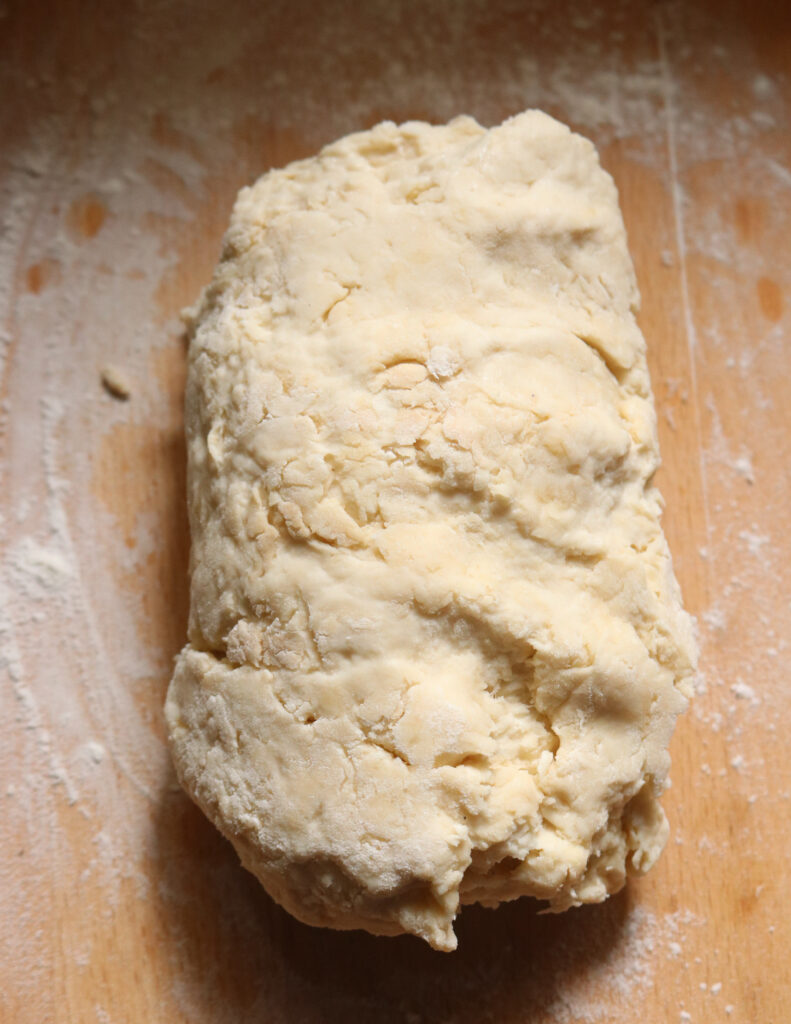
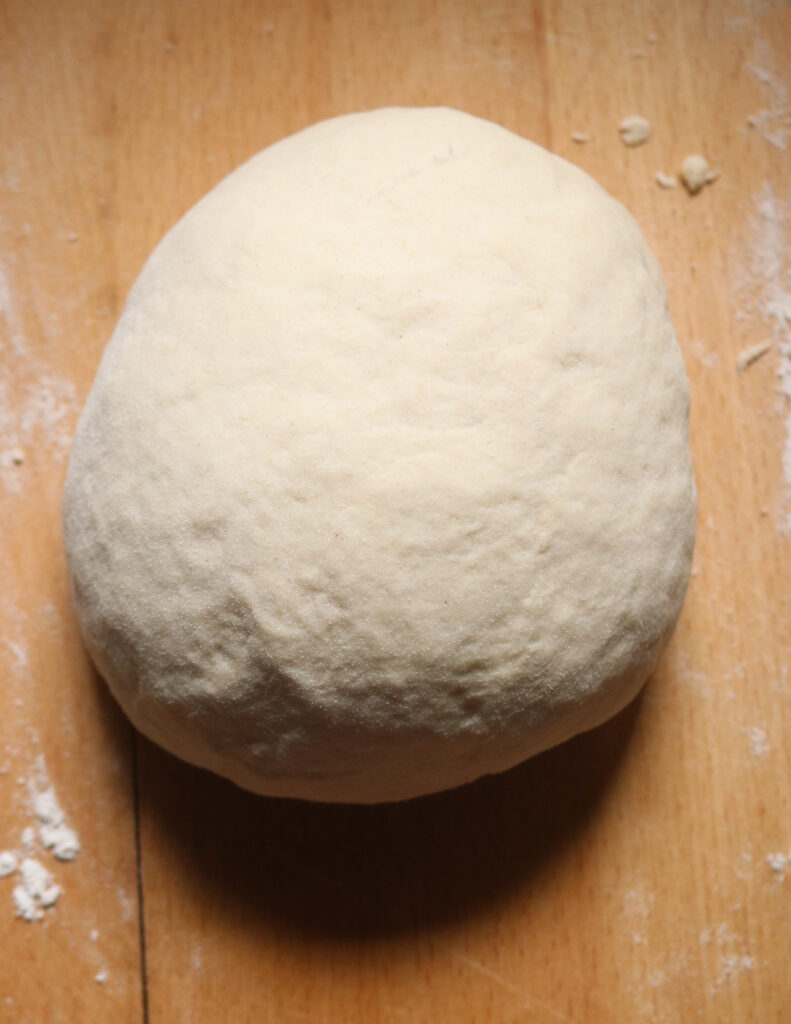
Knead the dough for 10 minutes until smooth(refer to tips above about kneading times).
Once you have a smooth dough ball, place it in a deep bowl, and cover it with a kitchen towel or cling film.
Place the bowl in a warm place to rise.
Cold weather or rainy days can have a direct effect on the first proofing, if this is the case then place the bowl inside your oven.
Let the dough rise for 1 hour and 30 minutes.
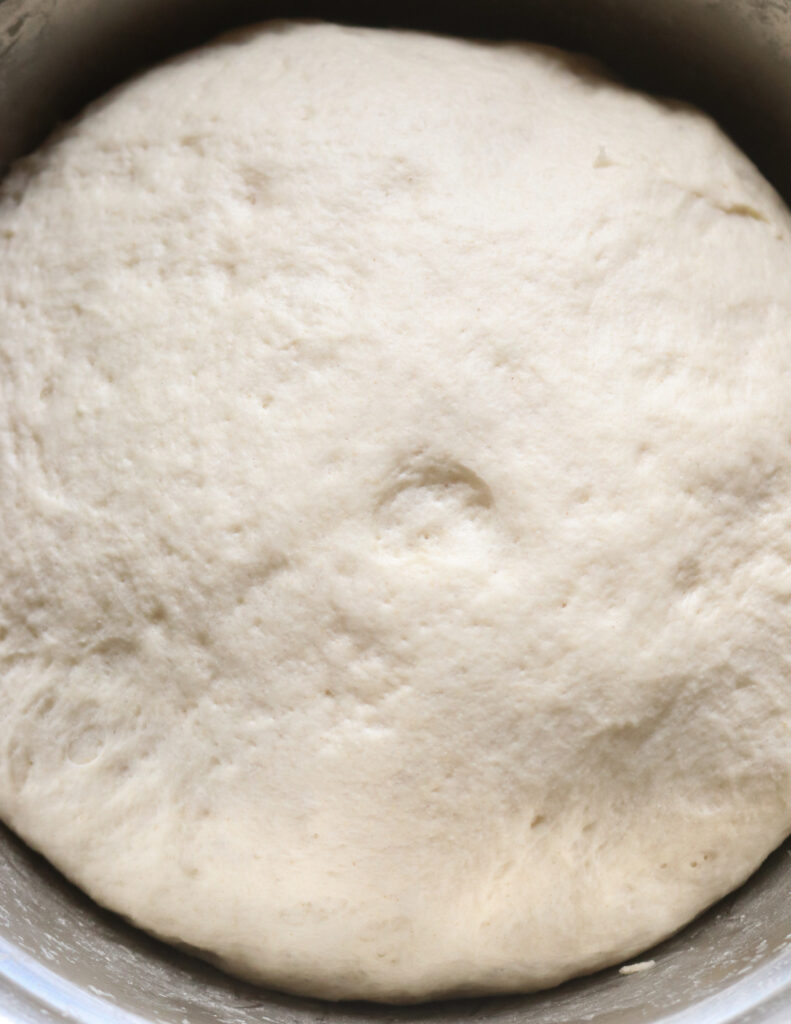
Once the dough rises, slowly punch down and then transfer the dough onto your floured board.
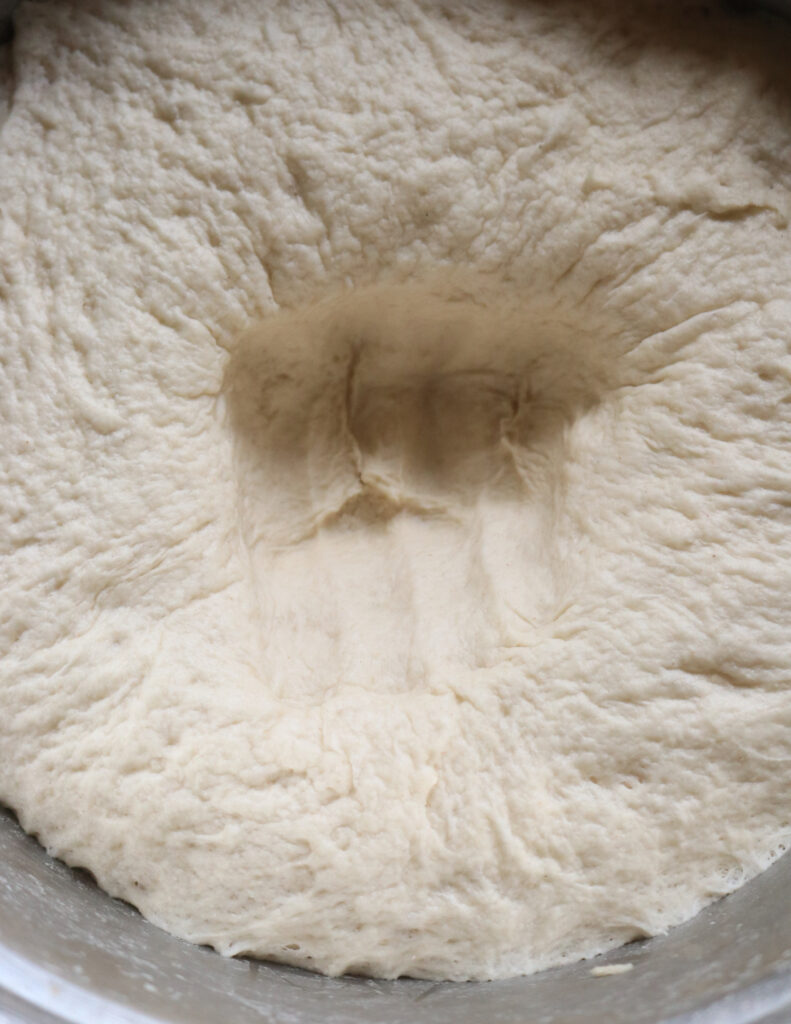
Use a tucking motion to gently shape the dough into a single large ball.
Once you have shaped the dough into a large ball.
Use a sharp long knife to cut the dough into 4 equal parts.

Divide the pieces further by cutting the 4 large pieces into two. This would result in 8 portions.
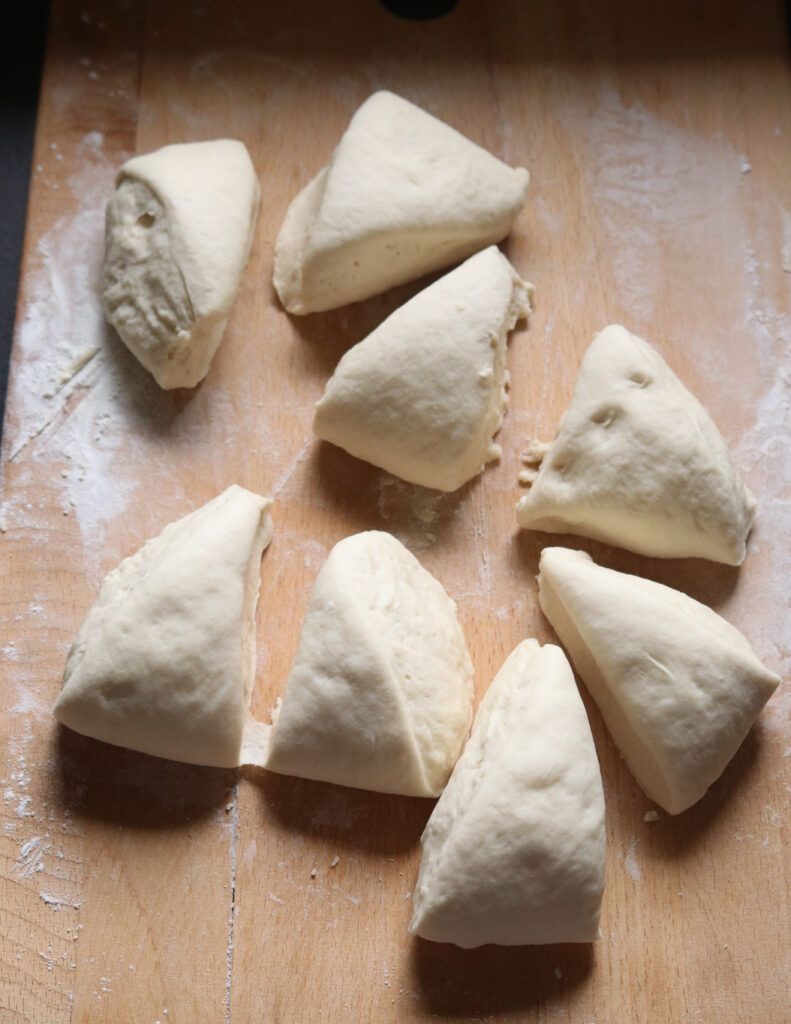
Roll these pieces of dough into individual balls.
How to shape the dough balls.
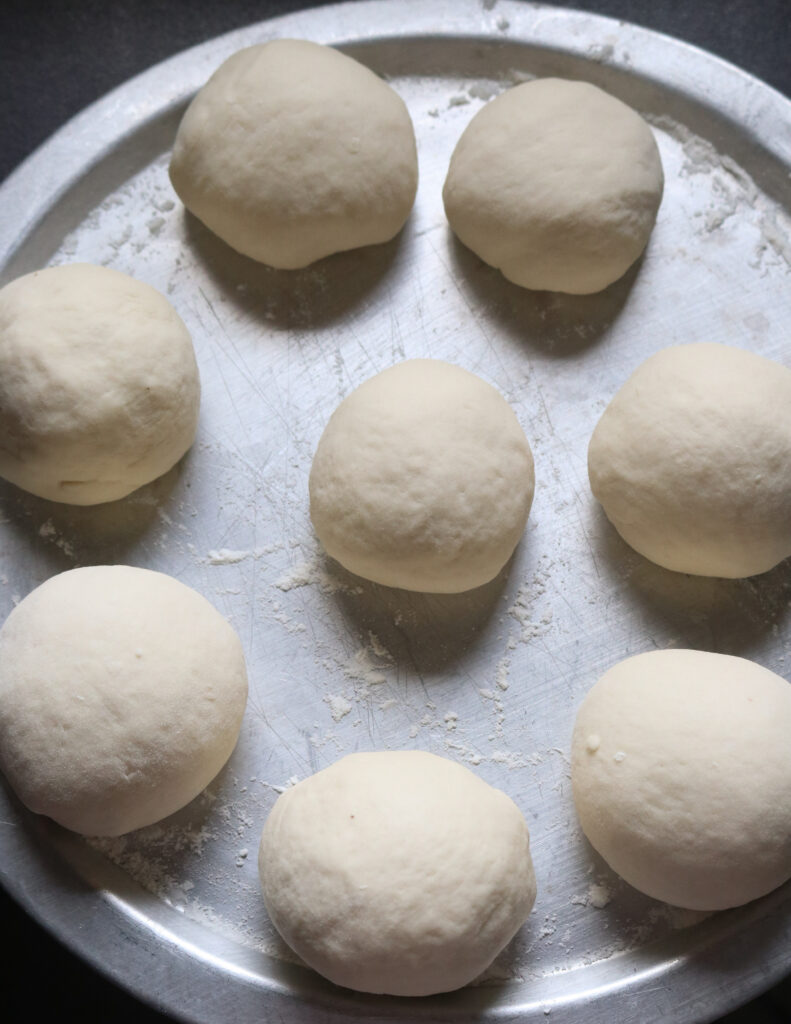
Place the sliced dough on the floured board. Place your hand over the piece of dough.
Gently cage the dough within your hand and fingers surrounding it.
Use a gentle circular motion repeatedly so that the piece of dough turns into a smooth ball.
Make 8 individual balls. don’t worry about the dough balls not being in equal size.
Once you go through the process of making the kibula banis, you can later refine your workflow to suit you.
Place them on a floured platter and cover with cling film or thick cloth.
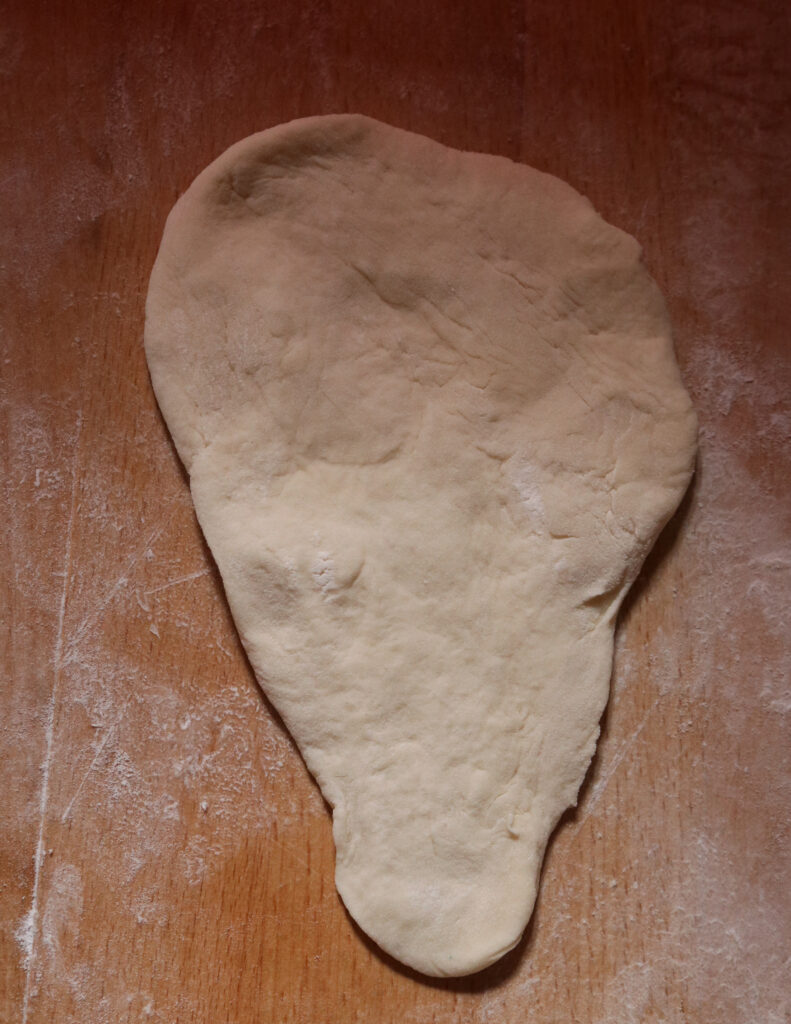
Shaping the dough.
Flour the board lightly and place a single dough ball on the board.
Place one palm over the top part of the dough ball while gently pulling the lower part down in the opposite direction.
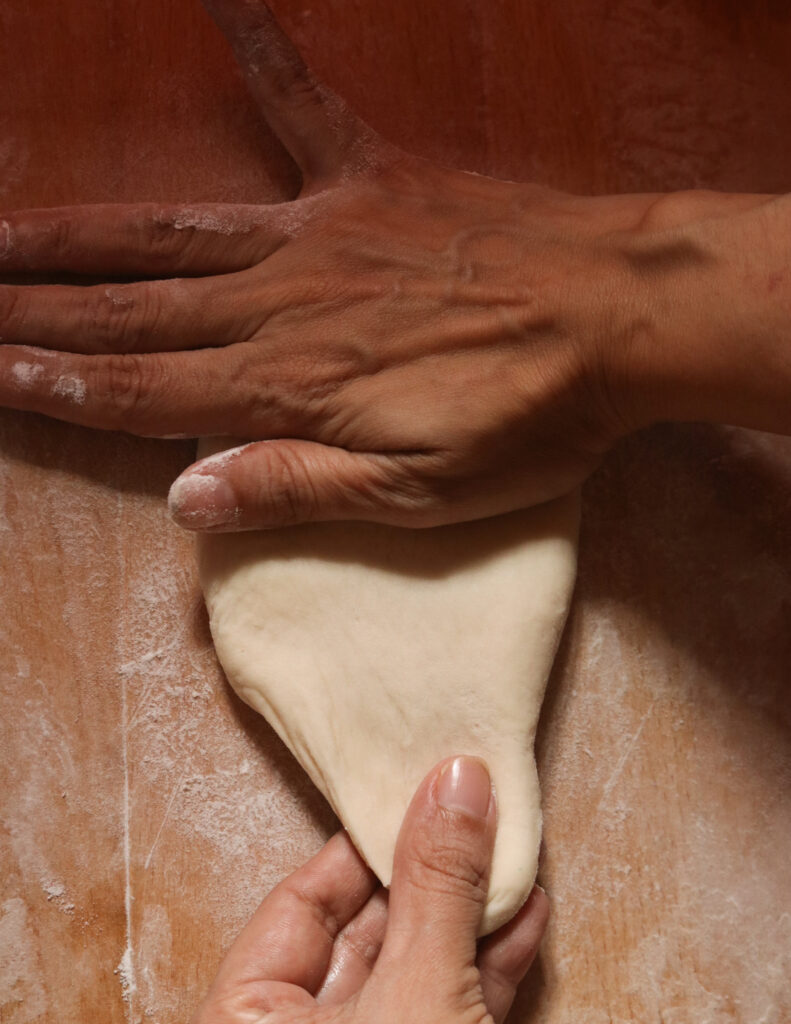
The pulling motion downwards should be done slowly with a little shake as you pull down.
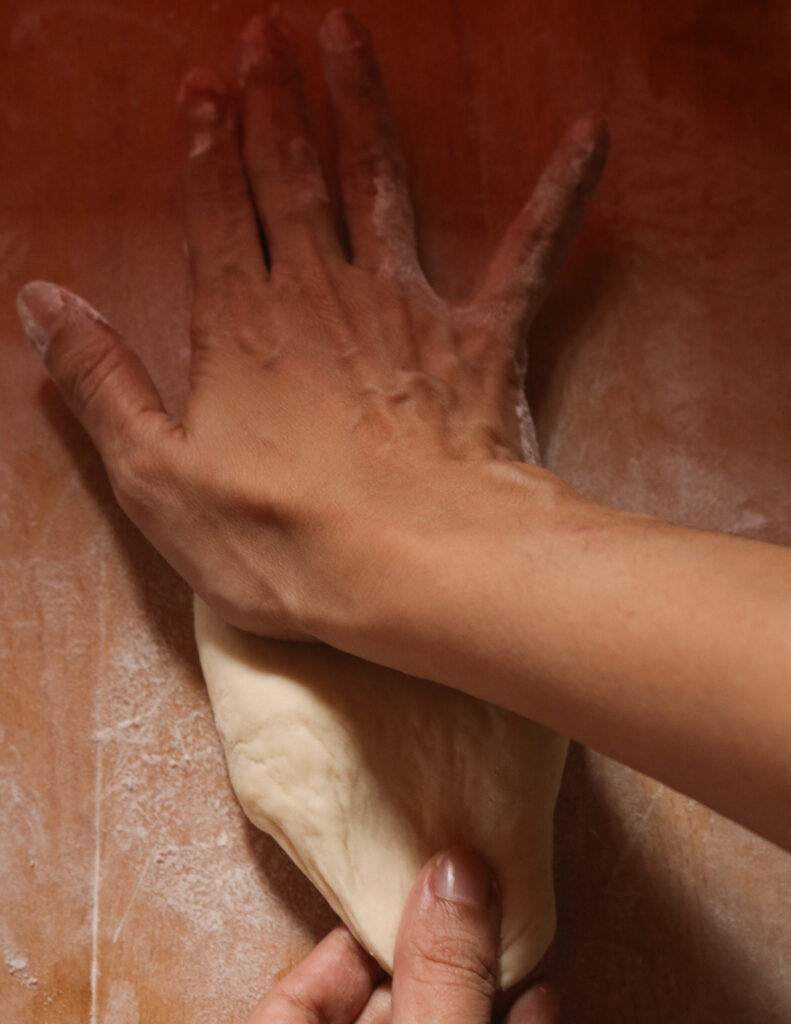
Your first shape should be a teardrop.
This might take a little practice but there’s enough dough for you to practice in forming the first shape of the sugar-coated buns.
Next, use a rolling pin to refine the shape.
To do this, use your roller pin from the middle of the dough moving at an angle to flatten the left side of the dough.

Repeat the motion from the middle on an angle upwards to flatten the right side of the dough.

Then place the rolling pin in the middle and roll it down towards the pointy end.

While you are using the rolling pin, make sure to gently pull the narrower part of the teardrop downwards.
Flip the dough over and repeat the above with your rolling pin.
Then use the rolling pin to further stretch and widen the upper part of the triangle.
Use the roller pin from the middle in a gentle downward motion to make the bottom a little longer.
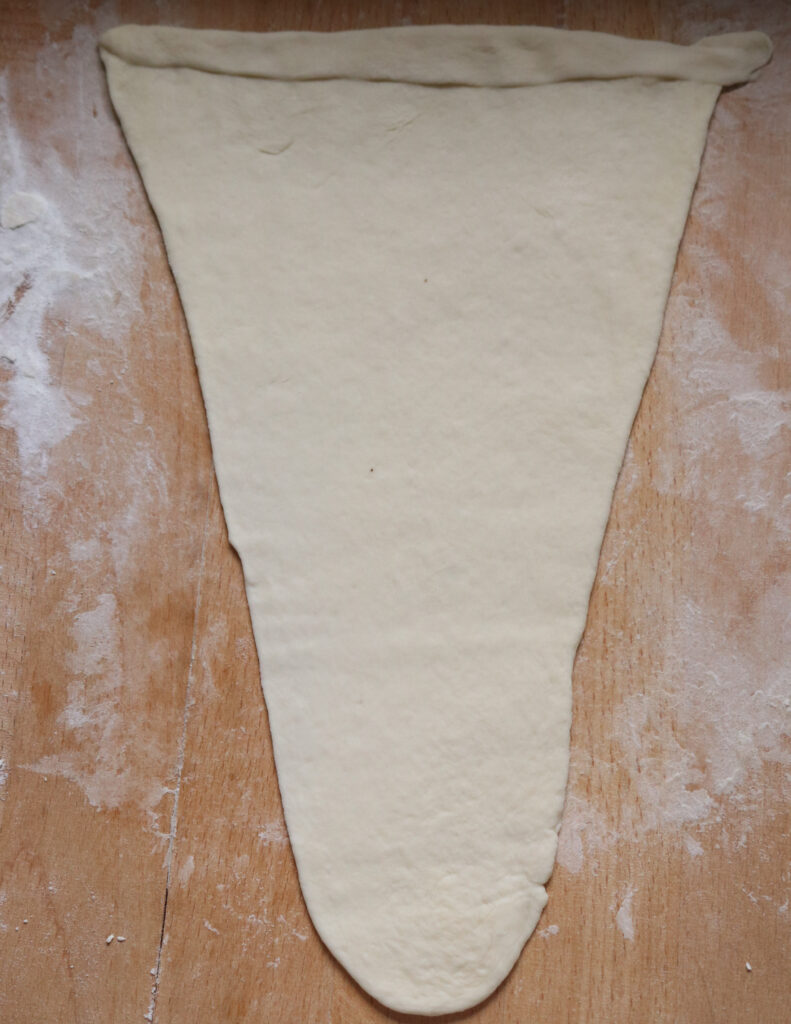
Repeat until you have a roughly shaped triangle.
While shaping the triangle, things to keep in mind.
- The rolling pin should not be pressed down too hard on the dough.
- The surface should be lightly floured to avoid the shaped dough sticking.
Shaping the triangle.
Once you have an elongated triangle as shown below.
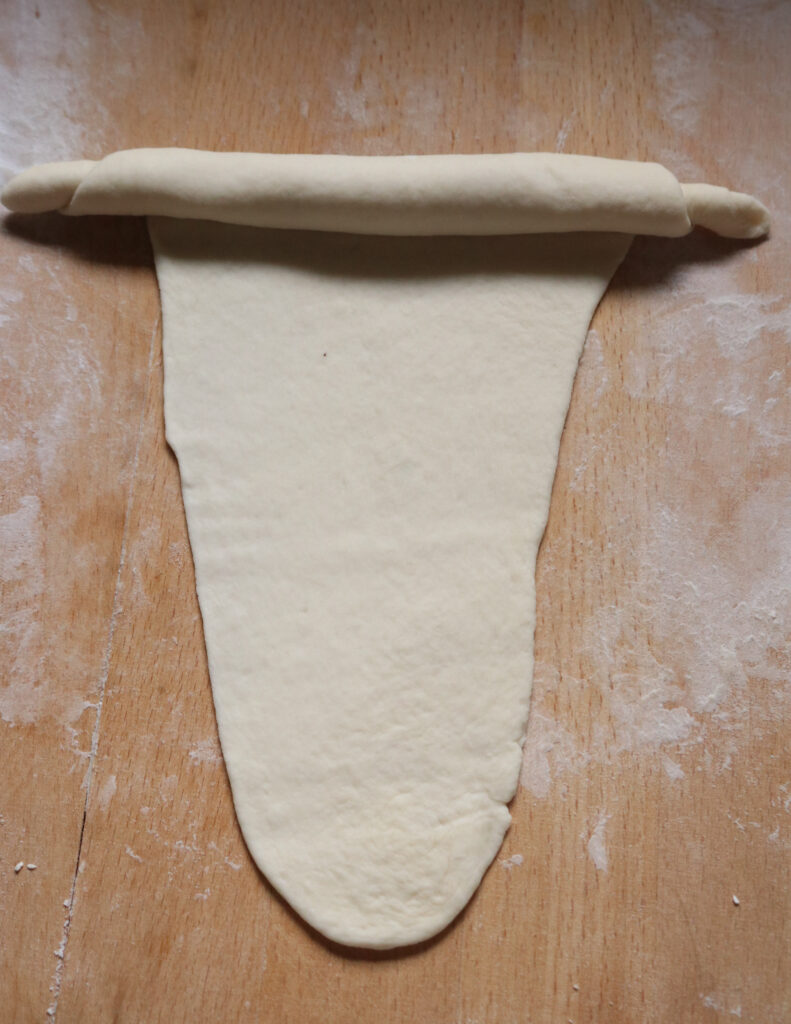
Fold the wider part of the dough inwards to make a 1/2-inch seam.
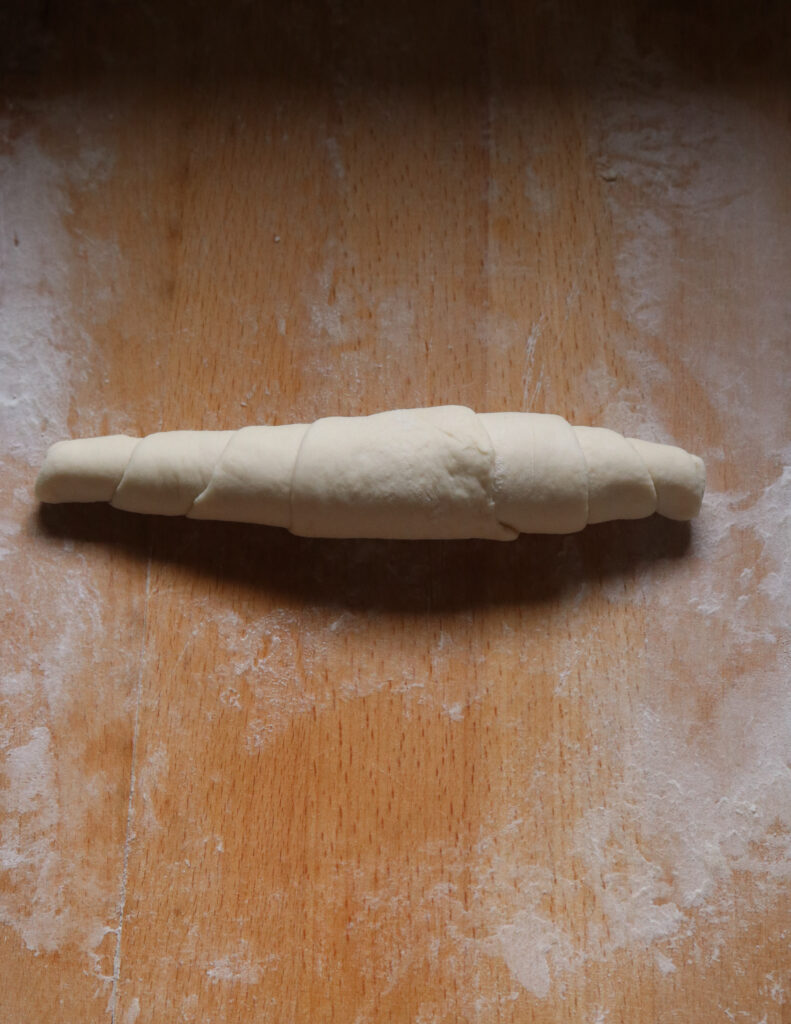
And then gradually roll the dough downwards until you reach the end of the narrow part of the triangle.
Pinch the end well to seal the dough. press the two pointy ends of the buns.
Set the shaped buns on a floured platter or tray and cover and let them prove(rise)for 35 minutes.
While the buns rise…
- Add 1/2 a cup of water to a pan and add 4 tablespoons of sugar. heat until the water turns syrup-like. set aside.
- On a separate flat platter or plate spread 1 cup of sugar.
- Fill a small oven-proof dish or a disposable foil cup halfway with water.
How to bake the kibula banis.
Preheat oven to 200C.
Cover your baking sheet with baking paper(parchment paper).
Thoroughly brush sugar syrup on the buns you’ll be baking and roll this side in sugar, make sure the tips get covered in sugar as well.
Place the kibula banis on the baking sheet with the sugar-coated side facing upwards.
Repeat until you have your first batch of kibula banis ready to go into the oven.
If you have a small oven this will happen in two batches so avoid coating them with sugar until they are ready to be placed in the oven.
Place the buns on the upper shelf of the oven. place the oven-proof dish with water on the bottom rack of the oven.
If using an oven without shelves place a foil cup of water on the tray with the buns. this is what I had to do with my convection oven.
Bake at 200C for 18 to 22 minutes or until light golden.
Remove the buns from the oven, let them cool for 10 minutes and enjoy.

JOIN ME ON ISLANDSMILE YOUTUBE CHANNEL
visit the SEAFOOD BLOG
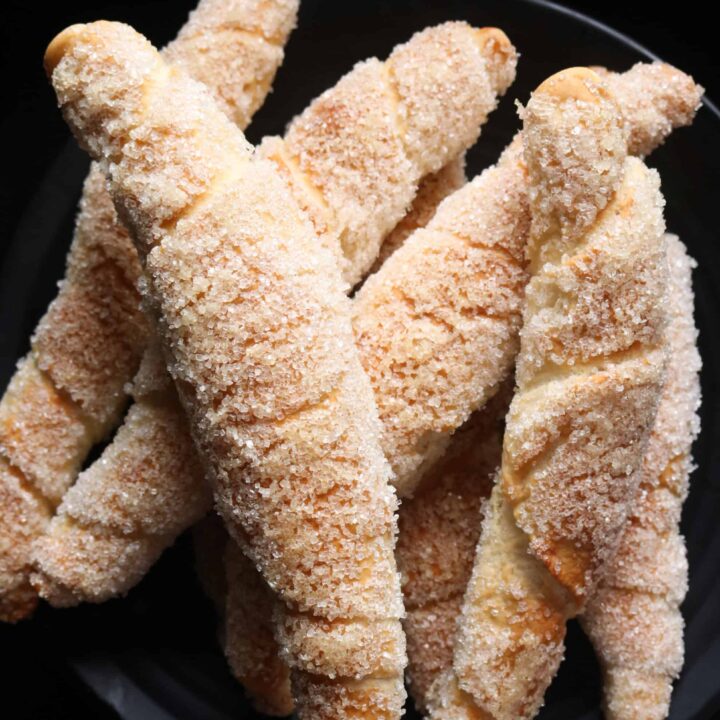
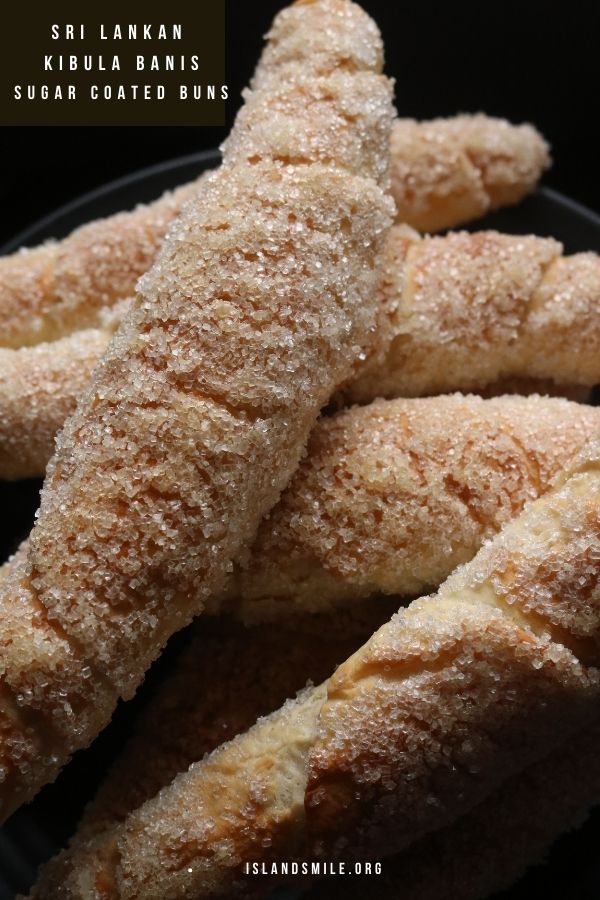
Sri Lankan kibula banis(sugar-coated buns).
kibula banis recipe with step-by-step instructions to help you make these buns right at home.
These buns are very popular with kids and adults alike.
You can serve these sugar-coated buns for breakfast or as a tea-time snack.
Ingredients
Ingredients to make kibula banis
- 1 cup of water (1/4 cup of water to be used to activate yeast and rest to mix the dough)
- 3 teaspoons of sugar
- 2 and 1/4 teaspoon yeast
To make the dough
- 2 and 1/2 cups of flour(or wheat flour as mentioned on the packaging).
- 1/2 cup extra flour(to be used as needed, to flour your hands, the kneading surface or to sprinkle over the dough, not).
- 2 teaspoons of salt
- 3 teaspoons of butter
- 1/4 cup of fresh milk(substitute with 3 tablespoons of milk powder)
Instructions
- Activate the yeast.
- Separate 1/4 cup of water from the cup of water needed to mix the dough.
- Microwave the 1/4 cup of water for 12 seconds.
- Water should be tepid(slightly warm, refer to tips above). You can heat the water over a stovetop as well.
- Add sugar and mix to dissolve it, add the recommended yeast amount, stir and cover. Set aside for 3-5 minutes.
- If your yeast is fresh when activated should look like the below image.
- While the yeast activates, you can mix the dough ingredients in a separate bowl.
How to mix the dough for kibula banis.
- To a large bowl, add flour and salt. combine them together for a few seconds.
- Add butter and milk.
- By now, your yeast should be ready. Add the yeast mixture to the flour mix.
- Mix the dough with your hand while gradually adding the rest of the remaining water.
- Make sure to incorporate all the ingredients together, scraping off any flour that is left around the bowl.
- If you feel the dough is not hydrated or rather dry, add water in tablespoons(about two).
- Once you have the dough mixed, cover with a kitchen towel or lid for 15 minutes and let the dough mixture rest.
- While the dough mixture rest, prepare your floured surface to knead the dough.
How to knead the dough.
- Once you have a lightly floured surface prepared, transfer the dough mix onto it.
- Dust some flour onto your hand as well as on top of your dough.
- Roughly shape as below. Don’t spend too much time doing this, all you need is a roughly shaped dough which can be folded inward towards the middle of the dough.
- Fold the top half of the dough to the centre and then gently roll it towards you.
- Position the dough vertically.
- Fold the top part to its centre again and roll it towards you.
- Repeat the process of folding, and rolling the dough.
- This is basically the kneading movements you will be using repeatedly.
- Dust your hands as well as the surface you are kneading with flour.
- Make sure you are kneading the dough gently and without much force.
- I like to remind myself that I’m gently massaging the dough with the right amount of pressure at this point.
- As you knead, you’ll notice, that you are using more of the heel of your palm and fingers like handles(for want of a better term)to knead and move the dough.
- As you repeat the gentle folding, and rolling motions you’ll feel the dough smoothing out.
- You will also notice a seam forming on the underside of the dough where you fold and roll out the dough.
Make sure not to break into this middle seam.
- Knead the dough for 10 minutes until smooth(refer to tips above about kneading times).
- Once you have a smooth dough ball, place it in a deep bowl, and cover it with a kitchen towel or cling film.
- Place the bowl in a warm place to rise.
- Cold weather or rainy days can have a direct effect on the first proofing, if this is the case then place the bowl inside your oven.
Let the dough rise for 1 hour and 30 minutes. - Once the dough rises, slowly punch down and then transfer the dough onto your floured board.
- Use a tucking motion to gently shape the dough into a single large ball.
- Once you have shaped the dough into a large ball.
- Use a sharp long knife to cut the dough into 4 equal parts.
- Divide the pieces further by cutting the 4 large pieces into two. This would result in 8 portions.
- Roll these pieces of dough into individual balls.
How to shape the smaller dough balls.
- Place the sliced dough on the floured board. Place your hand over the piece of dough.
- Gently cage the dough within your hand and fingers surrounding it.
- Use a gentle circular motion repeatedly so that the piece of dough turns into a smooth ball.
- Make 8 individual balls. don’t worry about the dough balls not being equal size.
- Once you go through the process of making the kibula banis, you can later refine your workflow to suit you.
- Place them on a floured platter and cover with cling film or thick cloth.
Shaping the dough balls into the kibula banis shape.
- Flour the board lightly and place a single dough ball on the board.
- Place one palm over the top part of the dough ball while gently pulling the lower part down in the opposite direction.
- The pulling motion downwards should be done slowly with a little shake as you pull down.
Your first shape should be of a teardrop.
- This might take a little practice but there’s enough dough for you to practice in forming the first shape of the sugar-coated buns.
- Next, use a rolling pin to refine the shape.
- To do this, use your roller pin from the middle of the dough moving at an angle to flatten the left side of the dough.
- Repeat the motion from the middle on an angle upwards to flatten the right side of the dough.
- Then place the rolling pin in the middle and roll it down towards the pointy end.
- While you are using the rolling pin, make sure to gently pull the narrower part of the teardrop downwards.
- Flip the dough over and repeat the above with your rolling pin.
- Then use the rolling pin to further stretch and widen the upper part of the triangle.
- Use the roller pin from the middle in a gentle downward motion to make the bottom a little longer.
- Repeat until you have a roughly shaped triangle.
While shaping the triangle, things to keep in mind.
- The rolling pin should not be pressed down too hard on the dough.
- The surface should be lightly floured to avoid the shaped dough sticking.
Shaping the triangle.
- Once you have an elongated triangle as shown below.
- Fold the wider part of the dough inwards to make a 1/2 inch seam.
- And then gradually roll the dough downwards until you reach the end of the narrow part of the triangle.
- Pinch the end well to seal the dough. press the two pointy ends of the buns.
- Set the shaped buns on a floured platter or tray and cover and let them prove(rise)for 35 minutes.
- While the buns rise…
- Add 1/2 a cup of water to a pan and add 4 tablespoons of sugar. heat until the water turns syrup-like. set aside.
- On a separate flat platter or plate spread 1 cup of sugar.
- Fill a small oven-proof dish or a disposable foil cup halfway with water.
How to bake the kibula banis.
- Preheat oven to 200C.
- Cover your baking sheet with baking paper(parchment paper).
- Thoroughly brush sugar syrup on the buns you’ll be baking and roll this side in sugar, make sure the tips get covered in sugar as well.
- Place the kibula banis on the baking sheet with the sugar-coated side facing upwards.
- Repeat until you have your first batch of kibula banis ready to go into the oven.
If you have a small oven this will happen in two batches so avoid coating them with sugar until they are ready to be placed in the oven.
- Place the buns on the upper shelf of the oven. place the oven-proof dish with water on the bottom rack of the oven.
- If using an oven without shelves place a foil cup of water on the tray with the buns. this is what I had to do with my convection oven.
- Bake at 200C for 18 to 22 minutes or until light golden in colour.
- Remove the buns from the oven, let them cool for 10 minutes and enjoy.
Recommended Products
As an Amazon Associate and member of other affiliate programs, I earn from qualifying purchases.
-
 Secura 60-Minute Visual Timer, Classroom Countdown Clock, Silent Timer for Kids and Adults, Time Management Tool for Teaching (Black)
 -
 Chef Knife PAUDIN N1 8 inch Kitchen Knife, German High Carbon Stainless Steel Sharp Knife, Professional Meat Knife with Ergonomic Handle and Gift Box for Family & Restaurant
 -
 Zulay 3 Cup Stainless Steel Flour Sifter - Fine Mesh Rotary Hand Crank Flour Sifter with Agitator Wire Loop For Baking Cakes, Pastries, Pies, Cupcakes and Desserts
 -
 Duralex LYS Mixing Bowl Set, 10 Piece, clear
 -
 Bamboo Cutting Board Set with Juice Groove (3 Pieces) - Wood Cutting Boards for Kitchen, Wood Cutting Board Set, Kitchen Chopping Board for Meat (Butcher Block) Cheese and Vegetables
 -
 Humbee Chef Serrated Bread Knife For Home Kitchens Bread Knife 10 Inch Black
Nutrition Information:
Yield: 8 Serving Size: 4Amount Per Serving: Calories: 108Total Fat: 2gSaturated Fat: 1gTrans Fat: 0gUnsaturated Fat: 1gCholesterol: 4mgSodium: 545mgCarbohydrates: 20gFiber: 1gSugar: 2gProtein: 3g
Nutrition facts are an estimate and not guaranteed to be accurate. Please see a registered dietitian for special diet advice.
Each recipe on this blog has been written with great care and love to the best of my ability with you in mind.
It’s free and on the blog, for you to try anytime.
All I ask is that you do not save it on any apps, recipe boxes, or online groups which will affect me as a food blogger and the growth of this blog.
I would appreciate it if you only share the link rather than the full recipe.
All images and text on this website are protected by copyright.
Sachi
Wednesday 26th of October 2022
Hi,can i use a stand mixer with dough hook to knead?also csn i use bread flour?thank you for sharing your recipes
jehan
Thursday 27th of October 2022
Hi Sachi, yes you can, maybe 5-7 minutes so that you don't over-mix it. yes bread flour would work too. And you are most welcome. regards, J