How to make Sri Lankan paratha(godamba roti).
This roti recipe is going to be your guide on how to make paratha step-by-step.
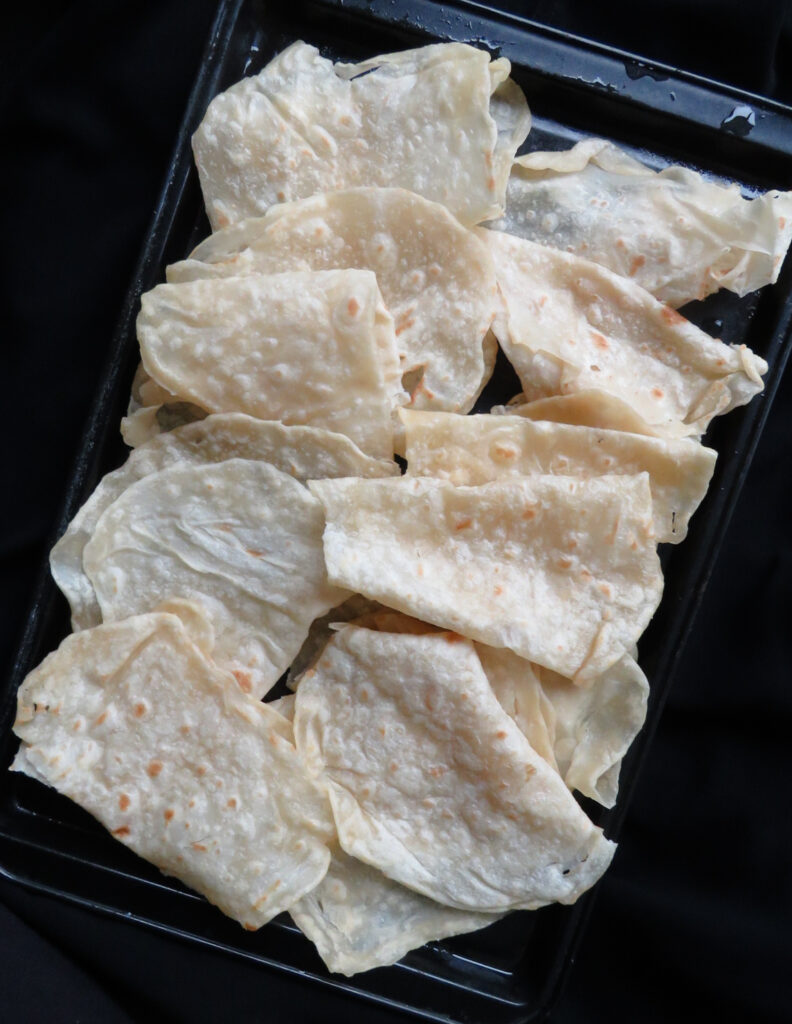
This flaky stovetop roti is also known as godamba roti.
Once you’ve learned to make it at home, you’ll never go back to buying them.
These roti/Parathas(godamba roti) are one of the easiest dinner favourites among us Sri Lankans.
They are soft, foldable roti available at most roadside restaurants that sell hoppers, string hoppers and other Sri Lankan dinner favourites.
Roadside restaurants have delicious food but…..
Roadside restaurants for some reason serve the most delicious food, they tend to make the best rotis, hoppers and kottu.
The parathas are premade in large quantities to serve customers in various ways from preparing kottu to curried vegetables and meat buns to turning them into parathas.
Although I’ve found buying them from these restaurants easy and the best way to sort out dinner quickly(leftover meat and these rotis), I have always had reservations about buying them.
I find the person who’s handling the parathas to be quite, umm… how do I write it without sounding offensive, unhygienic.
Yet, once or twice a month, I make my way to these roadside shops to indulge my craving for these soft parathas(godamba roti).
Making your own “godamba rotis”
After a few trials and errors, I now make my own godamba roti at home.
They turn out better and better every time I make them and yours will too, I promise.
I don’t toss or flip them as the roti maker does, I don’t use any special kitchen equipment to make them.
In fact, would you be surprised if I wrote, that I cooked these paratha roties on my favourite IKEA wok?
Just like I made the egg paratha rotis.
Yes, you read that right, by keeping the parathas slightly smaller in size, I make about 20-25 of these.
Save the recipe to Pinterest
. A versatile, all-time favorite roti paratha. Once you've learned to make it at home, you'll never go back to buying them. These roti/Parathas known as \"godamba roti\", are one of the easiest dinner favorites among us Sri Lankans.")
Homemade paratha/godamba roti are the best
As I’ve mentioned earlier,
If you’ve never made these Sri Lankan parathas and always buy them on the way home after work then it’s high time you tried making them.
With a little prep work and planning, the godamba roti can be ready by dinner time.
And the best part is once you’ve made these rotis a few times, you can make the popular “kottu roti”any time you want at home.
It’s more hygienic and fresh than what you buy from restaurants.
What to serve with godamba/paratha roti
- Here are some vegetarian curries to pair with the roti.
- chickpea and potato curry(chana aloo curry).
- Sri Lankan spicy Dry Potato curry(ala theldala)
- Sri Lankan Dhal curry(parippu, dal, daal).
- How to make easy-pressure cooker dal tadka(Indian dhal fry).
- Bombay potatoes(curried potatoes)
- potato korma(aloo kurma).
- easy button mushroom(canned) curry with gravy.
- How to cook a Sri Lankan-vegetarian soya meat curry.
- Meat dishes to serve with paratha roti.
- Minced beef curry(ground beef curry).
- Slow-cooked beef curry(like my grandmother makes).
- coconut curry beef stew with carrots and potatoes.
- Sri Lankan Spicy Beef and Potato keema curry.
- Chicken and Potato curry
- Sri Lankan chicken curry.
- Jack mackerel pepper fish curry(Sri Lankan).
- Sri Lankan canned fish curry(tin fish).
. A versatile, all-time favorite roti paratha. Once you've learned to make it at home, you'll never go back to buying them. These roti/Parathas known as \"godamba roti\", are one of the easiest dinner favorites among us Sri Lankans.")
Tips to make Sri Lankan roti parathas
- While combining the flour to make the dough, make sure to pour the water gradually so that the dough doesn’t end up being too wet.
- The most important step in the making of these parathas is, submerging the dough balls in oil for a long period.
- I have kept the balls of dough in oil for 3 hours to 6 hours. while both resting times work, I prefer to rest the dough for 6-7 hours.
- The parathas turn out to be more pliant and soft just like the ones you buy.
- Do not refrigerate the oil-submerged paratha balls, cover with a dish towel/ cling film and store them inside your microwave or oven.
- Once the dough balls have rested, they become easy to flatten into the thinnest parathas.
- This should be your goal, don’t worry about any holes appearing, there would definitely be one or two at the end but these too can be avoided as you get better at making them.
- rather than using your fingertips to make the parathas, use the flat palm of your hand.
- Use smoothing out movements to gradually flatten out the godamba roti.
- you can shape them any way you want as long as they are thin.
- Don’t use any extra oil but a non-stick pan to cook the parathas.
- Maintain low to medium heat, cooking time on each side would be a minute(I hesitate to give the exact times as your cooking time will vary depending on how much heat you are using but as a reference point, for me, it was 20-30 seconds on each side.
- It’s important you don’t expose the parathas to too much heat as this will result in dry parathas instead of soft ones.
- this dough recipe is basic enough that you can increase the amount of flour and other ingredients as long as it’s not too wet or dry.
FAQS: GODAMBA ROTI/PARATHA
- If I want to make these flat parathas roti for dinner, what time should I start making them?
- Say you want to serve dinner at 7.30 pm.
- You’ll want six hours(minimum) resting time for the dough balls in oil, I would suggest making the dough from 12.00-1.00 pm.
- As mentioned earlier if you make the godamba roti balls in the morning the soaking time will increase.
- Making parathas fora family of six.
- If you are a family of six, depending on how many adults and kids, you will need to adjust the quantity of flour used.
- As a reference point, I used 5 cups of flour to make just over 20 parathas. this may vary for you, depending on the size you make them.
Utensils and appliances needed
- You will need two separate bowls to mix and submerge in oil.
- a flat surface(I’m using a baking tray as seen in the image).
- a non-stick wok to make the roti(preferably not a skillet or frying pan). If you do have a large enough flat surface griddle pan, then use it instead of the wok.
More flatbread/ paratha recipes
Sri Lankan coconut roti(pol roti).
RECIPE DIFFICULTY-EASY
The ingredients mentioned below use standard measuring cups and spoons.
Ingredients to make godamba roti
Makes 8-10 medium-sized roti.
3 cups of flour
Salt to season
3 tablespoons of oil
1 cup water(you might need a little more)
Oil enough to cover the dough balls completely
How to make Sri Lankan parathas
How to make roti paratha dough
Add flour, salt, and oil to a large bowl.
Gradually pour water and combine ingredients to make a soft dough that is not too wet or dry. 5 minutes.
Once you’ve made godamba roti dough, continue kneading for another 12 minutes.
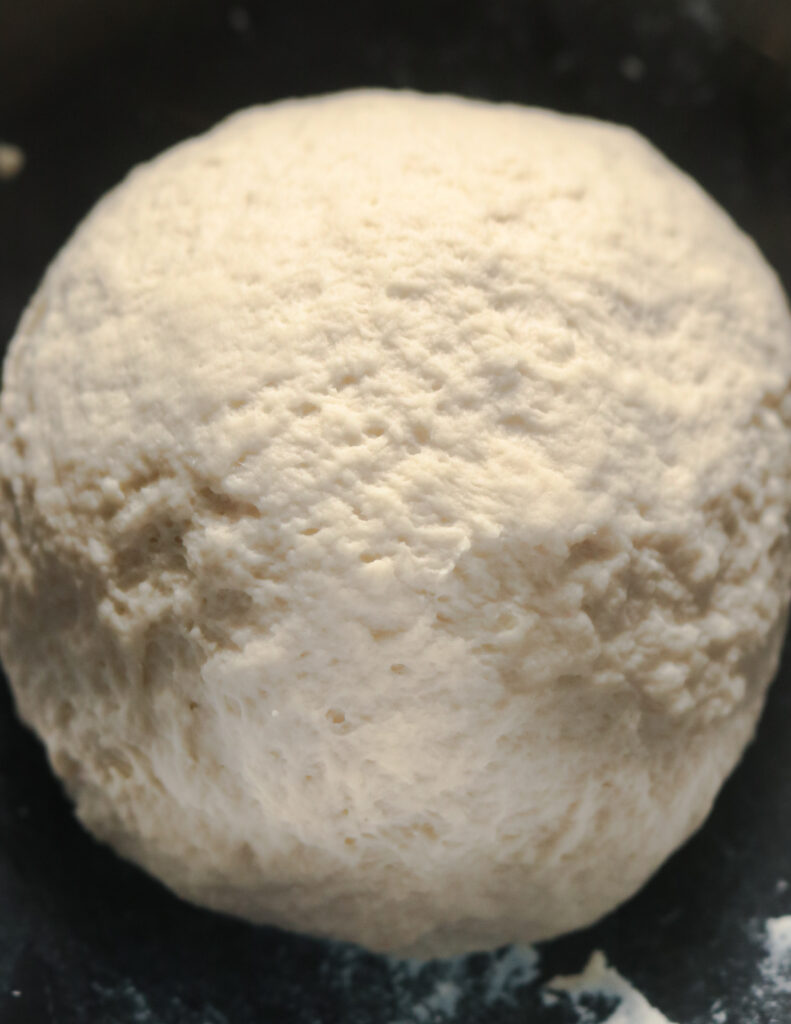
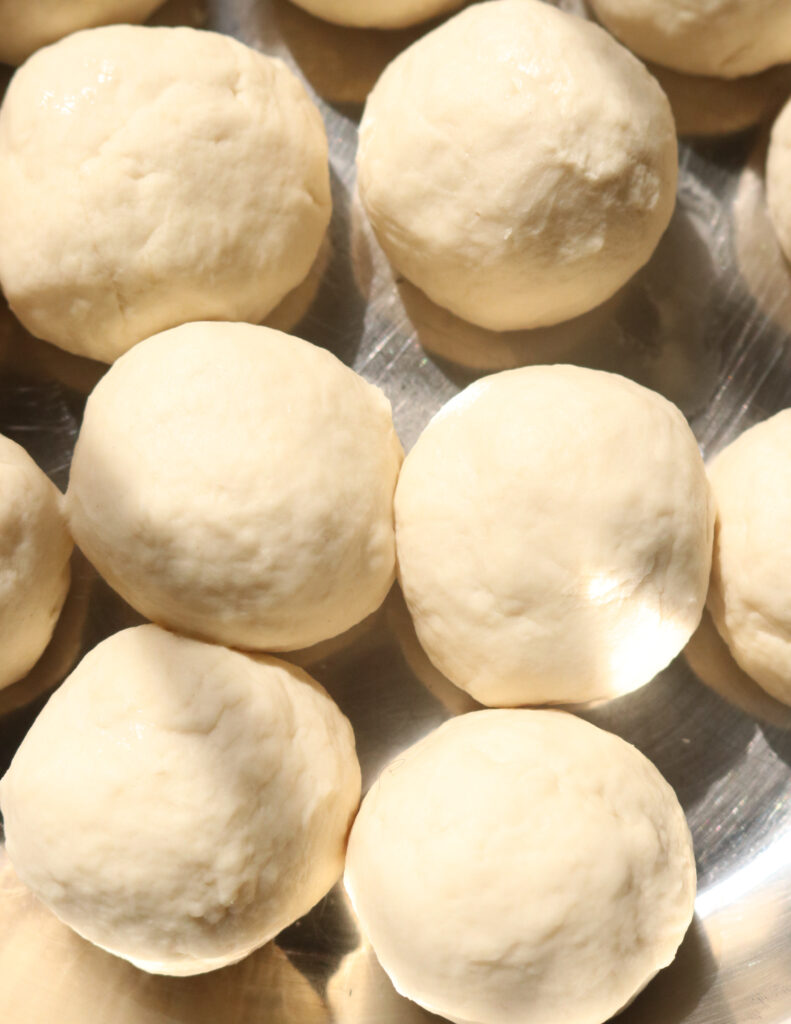
Divide the dough into equal-sized balls and set them aside.
These balls should be slightly bigger than golf balls.
How to soak the paratha dough in oil.
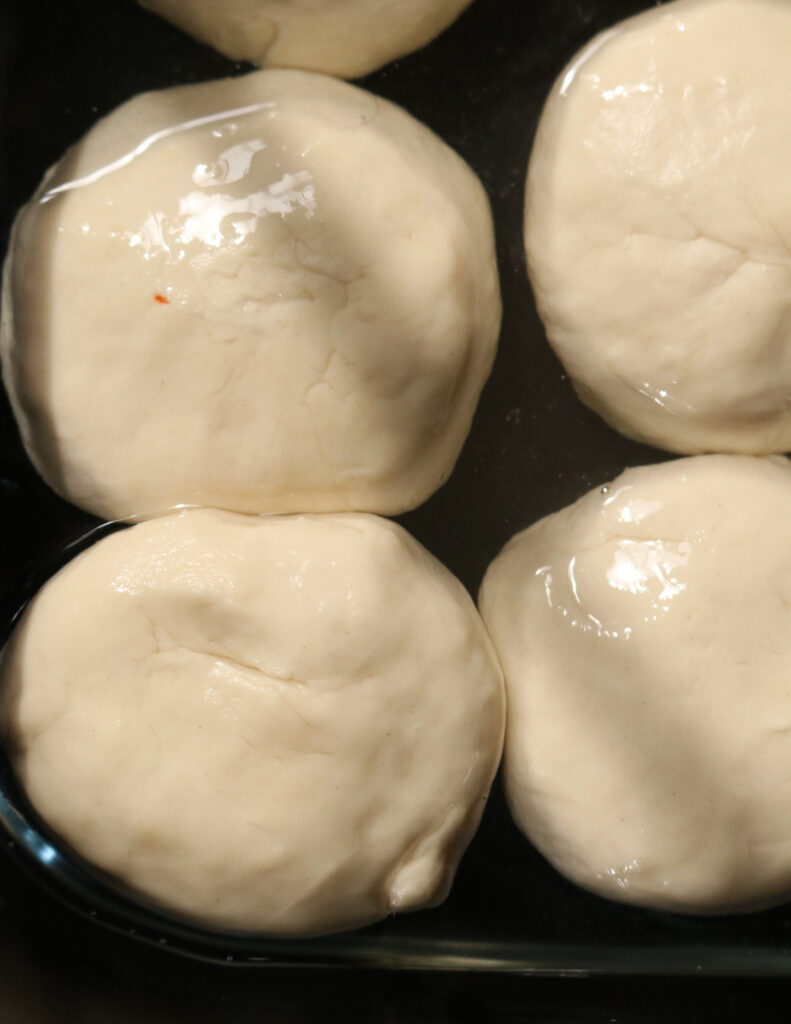
Pour 2 cups of oil into a separate flat-surfaced bowl and place the dough balls into them.
The idea is to completely submerge the dough balls in oil for several hours.
Turn them into disks, this way you can avoid adding more oil to the pan.
Try to keep the balls from touching each other if possible, you can avoid them sticking to each other.
Cover and rest the balls of dough for 7-8 hours. you can also rest the dough balls overnight.
How to cook the godamba roti
Once the dough has been resting for a few hours.
Place a wok over low heat for a few minutes.
While the wok is heating over low heat, prepare a surface close to the stove to make the parathas so it’s easy to transfer them to the wok.
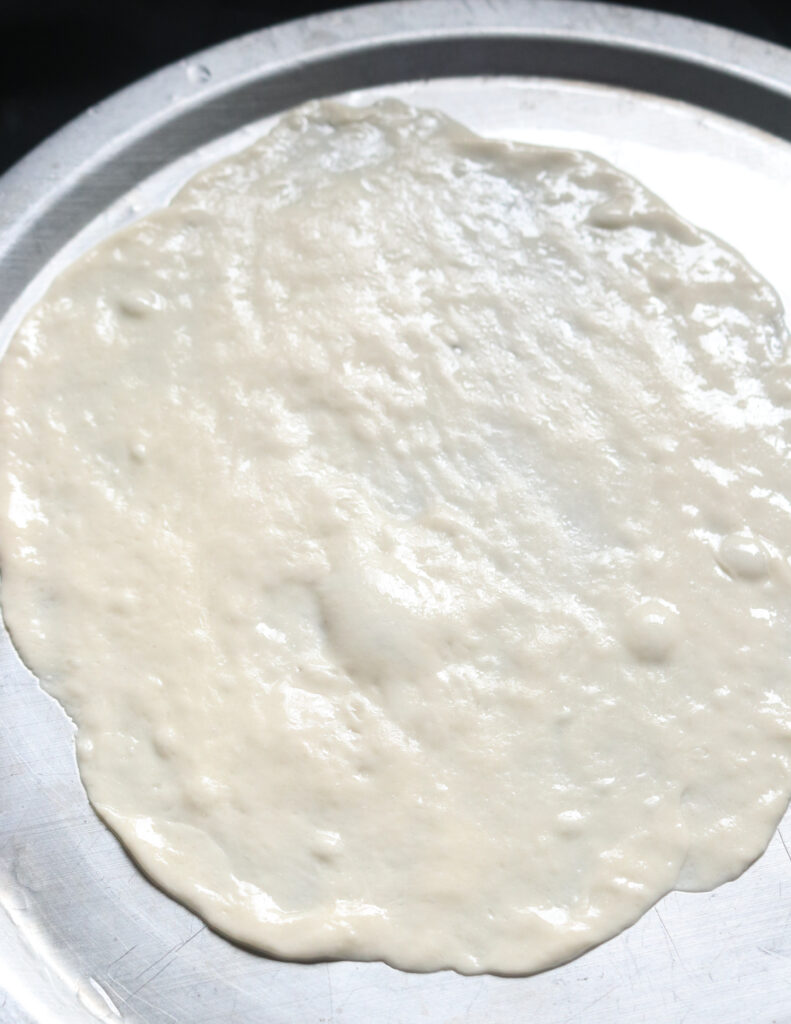
As mentioned earlier in the instructions above, on a flat surface(I’m using a sheet pan).
Flatten the dough first using your fingertips and then with the flat palm of your hand.
Smooth, stretch and flatten to shape them.
These don’t need to be perfect, they can even have tiny holes.
Use a smoothing-out movement to stretch the dough.
Once you have flattened the parathas, gently lift the paratha/godamba roti using both hands(similar to hanging garments on a clothesline)and place it on the heated wok.
Let the paratha cook for a few seconds(10-12).
Once the roti cooks and you can move them over the non-stick surface, using a wooden spatula start folding the roti while it cooks.
Continue to fold and unfold while it cooks for a few more seconds(try to keep the cooking under 60 seconds so the roti doesn’t turn out too dry).
Continue making the godamba roti until all the balls of dough are done.
Transfer any leftover oil to a container for later use.
Serve with any meat curries or try out the dinner ideas mentioned above.
JOIN ME ON ISLANDSMILE YOUTUBE CHANNEL
VISIT THE SEAFOOD BLOG

How to make Sri Lankan paratha (godamba)roti.
This roti recipe is going to be your guide on how to make paratha step-by-step.
This flaky stovetop roti is also known as godamba roti.
Once you’ve learned to make it at home, you’ll never go back to buying them.
Ingredients
- Ingredients mentioned below use standard measuring cups and spoons.
- 3 cups of flour
- Salt to season
- 3 tablespoons of oil
- 1 cup water(you might need a little more)
- Oil enough to cover the dough balls completely
Instructions
How to make the roti/paratha dough.
Add flour, salt, oil into a large bowl.
Gradually pour the water and combine ingredients to make a soft dough that is not too wet or dry. 5 minutes.
Once you've made godamba roti dough, continue kneading for another 12 minutes.
Divide the dough into equal-size balls and set them aside.
These balls should be slightly bigger than golf balls.
How to soak the paratha doughs in oil.
Pour in 2 cups of oil into a separate flat-surfaced bowl and place the dough balls into them.
The idea is to completely submerge the dough balls in oil for several hours.
Turn them into disks, this way you can avoid adding more oil to the pan.
Try to keep the balls from touching each other if possible, you can avoid them sticking to each other.
Cover and rest the balls of dough for 7-8 hours. you can also rest the dough balls overnight.
How to make the godamba roti/paratha.
Once the dough has been resting for a few hours.
Place a wok over low heat for a few minutes.
While the wok is heating over low heat, prepare a surface close to the stove to make the parathas so it's easy to transfer them to the wok.
As mentioned earlier in the instructions above, on a flat surface(I'm using a sheet pan), flatten the dough first using your fingertips and then with the flat palm of your hand.
Smooth, stretch and flatten to shape them into parathas.
These don't need to be perfect, they can even have tiny holes. Use a smoothing-out movement to stretch the dough.
Once you have flattened the parathas, gently lift it using both hands(similar to hanging garments on a clothesline)and place it on the heated wok.
Let the paratha cook for a few seconds(10-12).
Once the roti cooks and you can move them over the non-stick surface, using a wooden spatula start folding the roti while it cooks.
Continue to fold and unfold while it cooks for a few more seconds(try to keep the cooking under 60 seconds so the roti doesn't turn out too dry).
Continue making parathas until all the balls of dough are done. transfer any leftover oil to a container for later use.
Serve with any meat curries or try out the dinner ideas mentioned above.
Recommended Products
As an Amazon Associate and member of other affiliate programs, I earn from qualifying purchases.
-
 Mueller HyperGrind Precision Electric Spice/Coffee Grinder Mill with Large Grinding Capacity and HD Motor also for Spices, Herbs, Nuts, Grains, White
 -
 Spice Container - Masala Dabba - 7 Compartments, masala box,steel masala dabba,Spice container box,stainless steel spice box indian masala dabba with 7 spice containers with size 8 X 8 inches (1)
 -
 CINEYO Premium Quality Manual Lemon and Lime Squeezer - Manual Citrus Juicer Press, Hand Juicer Kitchen Tool and Professional use,
 -
 KIZEN Digital Meat Thermometer with Probe - Waterproof, Kitchen Instant Read Food Thermometer for Cooking, Baking, Liquids, Candy, Grilling BBQ & Air Fryer - Black/White
 -
 Bamboo Cutting Board Set with Juice Groove (3 Pieces) - Wood Cutting Boards for Kitchen, Wood Cutting Board Set, Kitchen Chopping Board for Meat (Butcher Block) Cheese and Vegetables
 -
 Secura 60-Minute Visual Timer, Classroom Countdown Clock, Silent Timer for Kids and Adults, Time Management Tool for Teaching (Black)
 -
 Fullstar Vegetable Chopper - Spiralizer Vegetable Slicer - Onion Chopper with Container - Pro Food Chopper - Black Slicer Dicer Cutter - 4 Blades
 -
 Kitchen Shears, iBayam Kitchen Scissors Heavy Duty Meat Scissors Poultry Shears, Dishwasher Safe Food Cooking Scissors All Purpose Stainless Steel Utility Scissors, 2-Pack (Black Red, Black Gray)
 -
 OXO Good Grips 3-Piece Wooden Spoon Set
 -
 EZ Off Jar Opener - Under Cabinet Jar Lid & Bottle Opener - Opens Any Size Jar - Great for Arthritis - Perfect for Seniors & Weak Hands
 -
 Chef Knife PAUDIN N1 8 inch Kitchen Knife, German High Carbon Stainless Steel Sharp Knife, Professional Meat Knife with Ergonomic Handle and Gift Box for Family & Restaurant
Nutrition Information:
Yield: 8 Serving Size: 1Amount Per Serving: Calories: 360Total Fat: 15gSaturated Fat: 3gTrans Fat: 0gUnsaturated Fat: 10gCholesterol: 0mgSodium: 192mgCarbohydrates: 50gFiber: 2gSugar: 0gProtein: 6g
Nutrition facts are an estimate and not guaranteed to be accurate. Please see a registered dietitian for special diet advice.
Each recipe on this blog has been written with great care and love to the best of my ability with you in mind.
It’s free and on the blog, for you to try anytime
All I ask is that you do not save it on any apps, recipe boxes or online groups which will affect me as a food blogger and the growth of this blog.
I would appreciate it if you only share the link rather than the full recipe.
Cha
Wednesday 26th of April 2023
Can I use olive oil, sunflower or canola oil for this ? Thank you
jehan
Thursday 27th of April 2023
sun flower oil canola should do. olive might not work as it might affect the texture of the roti. regards J
Rashida Banu
Wednesday 29th of December 2021
Hi , what flour ,is it wheat flour or Maida?
jehan
Saturday 1st of January 2022
Hi Rasheeda, Regular wheat/ regular bread flour. Regards, J
Geoffrey Jayasekera
Tuesday 13th of July 2021
Hi Jehan (got that right I hope!)
Haven't had godamba roti's for years and years and had the intense urge to have some - so, I hit on your site and found the directions precise and exact followed it to the letter - ended up with lovely lace like rotis, and even made some parcels filled with a mince curry (like a kheema).
Thanks for your great work Jehan, really appreciate it.
Warmest regard
Geoffrey
jehan
Tuesday 13th of July 2021
Hi Geoffrey, First, thank you for the lovely message. Glad the recipe worked out for you and it does help when you write back with the results. If you are interested, there are a couple of keema recipes on the blog as well. Could you please, rate the recipe on the recipe card, it helps with other readers finding the recipe on google easily. And you are most welcome. Stay safe and regards, J
Renuka
Sunday 16th of May 2021
Your recipes sound great - have copied the naan and the easy chillie paste - and will give feedback after making. I expect them to be good and appreciate the detailed instructions. Shows your attention and care - well done! Now, in exchange, for a few tips about Godas which I have been making at my home in Germany for 15 years or so. 6-7 hours resting and submerged in oil are spot on. But I won’t flatten onto discs - might stick to one another ... Now, the cooking temperature, (for you only, mind, not your readers till they get more experienced) .. I have the heat high and stack the rotis on top of each other and keep flipping on the pan itself a few times. High heat gives a DELICIOUS burnt spot or two, but to stop the drying I stack the fresh one on top of the cooked side after flipping and then flip again after second side is done. And add the next roti on the freshly done side and flip later again. So I have up to 6-7 rotis all together in a stack on my pan at any given time. They don't stick as made with ample oil smeared on the pan. The stacking keeps them soft but flipping makes them also crispy - a very difficult combo to achieve otherwise. And this also gives hot, well cooked and deliciously complex rotis. The street side rotis also have ripped areas as well as differences in thicknesses - which usually taste great as the alternating crsipy and charred and soft areas give a huge variety of crunch, taste and chewing experiences as well. So don’t flatten them all to the same thickness - and as you said also, go for the thinnest possible, but if the roti rips - let it be. Folding the edges over also gives differences in thickness. But these areas need more time to cook than the tissue thin areas - which is why stacking helps. All are tips I learnt by paying a street goda vendor in Kandy 500 rupees extra 16 years ago while eating on holiday and lamenting it the last chance for another year!! On the off chance asked if he would teach for a fee and he agreed :) To my eye and my taste your rotis look great parathas, but are a bit too uniform and just a bit too thick for godas ... sorry, that’s just MY taste. A goda from a lemon sized dough ball would be stretched to 15”x15” and with folded over edges end up around 12”x12” - and have ripped areas, black charred spots, browned spots and soft thick areas. A very different animal to a uniform paratha (which too I love, having learnt from my Punjabi best friend here) - though they do share the basic dough and the rich oily taste. BTW I also copied your poori recipe - have been making them more than 25 years YET got a great semolina tip from you! Have tried a bit of semolina in my crispy dosas to success for a while and planning same on hoppers but the tip on pooris is from you. Thanks !
jehan
Wednesday 19th of May 2021
Hi Renuka, Thank you so much for your detailed method on how to make godamba roti, I bet that rs 500 was the best investment you made if you've learned from a daily godamba roti maker. please let me know how the naan roti and chilli paste came out. always looking out for constructive criticism which will help other readers to make the recipe without any confusion or problem. I try to write a detailed recipe as much as I can because I've learned by error that the small details in cooking make a big difference in the outcome. Thank you for the detailed way of how you make the godamba roti will definitely try out your method. The uniformity of the godambas is not something that happens all the time, only I have to make the pics for the recipes pretty and mouthwatering at a glance, the thickness and uniformity help to get great pics of them. And you are most welcome on the semolina tip. Love your tips and love your comment as it is truly helpful and gives me perspective from someone who really took the time to read and give me feedback on it. I hope you can write back and keep me on my toes to do a better job in delivering fail-proof recipes. the recipes here are used by beginners, intermediate and even very advanced cooks so I really do need to pay attention to details. please do excuse if you do come across any mistakes as this is a one lady operation so errors are bound to happen sometimes. Stay safe and blessed and hope to hear from you soon. regards J
Shirley Canagasabey
Friday 19th of February 2021
I tried the gothamba rotti today * it turned out great for a first attempt. I rested it only for 5 hrs. Thank you very much
jehan
Friday 19th of February 2021
Hi Shirley, You are most welcome, glad the roti came out well for you. please do rate the recipe if it was helpful. Thank you, regards J