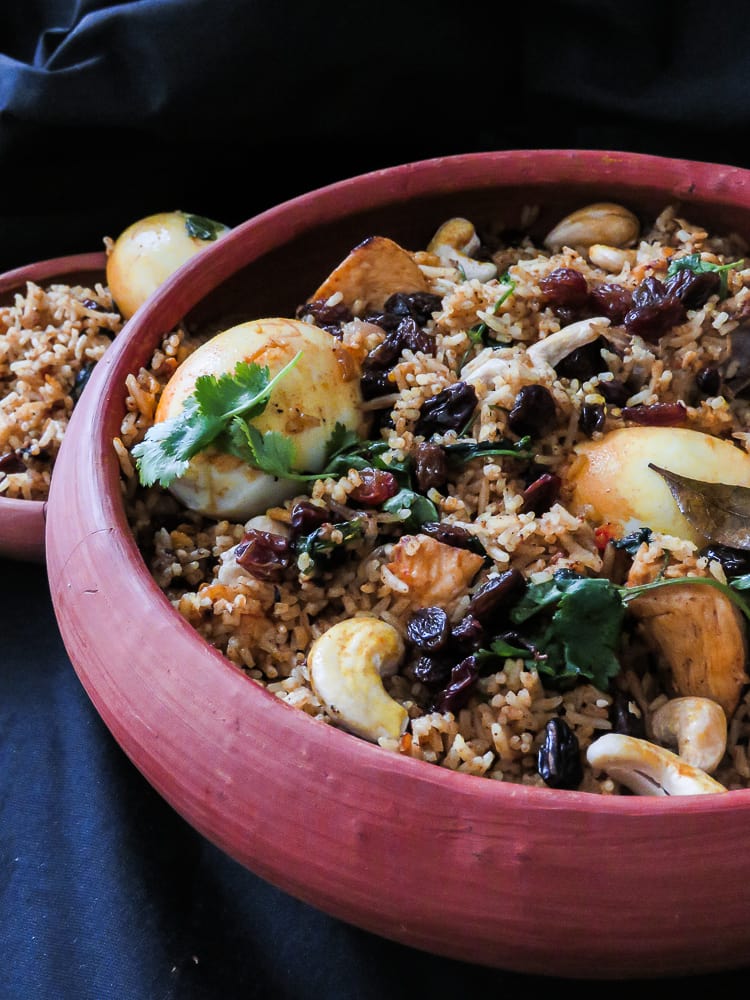
Chicken pot Biryani.
With easy-to-follow instructions will make you a Sri Lankan-inspired pot Biryani not just for special occasions but an easy meal for family and friends.
Don’t you just love when a meal goes well with both adults and kids?
This is my mom’s own spin on Pot Biryani with a Srilankan flare, her Friday special is now my favorite for busy weekdays or special occasions.
Glancing at the long list of ingredients, you might be slightly reluctant to try this recipe but I promise you, it’s not that complicated if you think of the cooking process in stages.
I’m doing this in four stages and explaining as much as I can, in case this is your first time.
As I wrote earlier, the recipe forms in four stages,
1. marinating the chicken
2. the cooking of the rice
3. the frying of certain key ingredients
4. when everything comes together.
And for the curious mind, here are a few interesting snippets from Wikipedia.
The word “biryani” is derived from the Persian language, which was used as an official language in different parts of medieval India, by the various Turkic and Mughal ruling dynasties of Central Asian origin.
One theory is that it originates from “birinj”, the Persian word for rice. Another theory is that it derives from “biryani” or “beriyan” (to fry or roast)
Lizzie Collingham states that the modern biryani was created in the Mughal royal kitchen, as a confluence of the native spicy rice dishes of India and the Persian Pilaf, However, another theory claims that the dish was known in India before the first Mughal emperor Babur came to India.
According to Pratibha Karan, the biryani is of South Indian origin, derived from Pilaf varieties brought to India by the Arab traders. She speculates that the pulao was an army dish in medieval India: the armies, unable to cook elaborate meals, would prepare a one-pot dish where they cooked rice with whichever meat was available.
Over time, the dish became biryani due to different methods of cooking, with the distinction between “pulao” and “biryani” being arbitrary.
Pratibha Karan states that while the terms are often applied arbitrarily, the main distinction is that a biryani comprises two layers of rice with a layer of meat (or vegetables) in the middle; the pulao is not layered.
And after reading this, I realized, my mom’s version is a combination of both and since people are still undecided about the difference between Pilaf and Biryani.
I’m officially categorizing this recipe as a Biryani.

Colleen Taylor Sen lists the following three distinctions between biryani and pulao:
- Biryani is the primary dish in a meal, while the pulao is usually a secondary accompaniment in a larger meal.
- In biryani meat and rice are cooked separately before being layered and cooked together. Pulao is a single-pot dish: meat and rice are simmered in a liquid until the liquid is absorbed. However, some other writers, such as Holly Shaffer (based on her observations in Lucknow), R. K. Saxena and Sangeeta Bhatnagar have reported pulao recipes in which the rice and meat are cooked separately and then mixed before the dum cooking.
- Biryanis have more complex and stronger spices, compared to pulao. the biryani has a stronger taste of curried rice due to a higher amount of spices.
for further reading please follow this link on Wikipedia
Let’s begin with the recipe on,
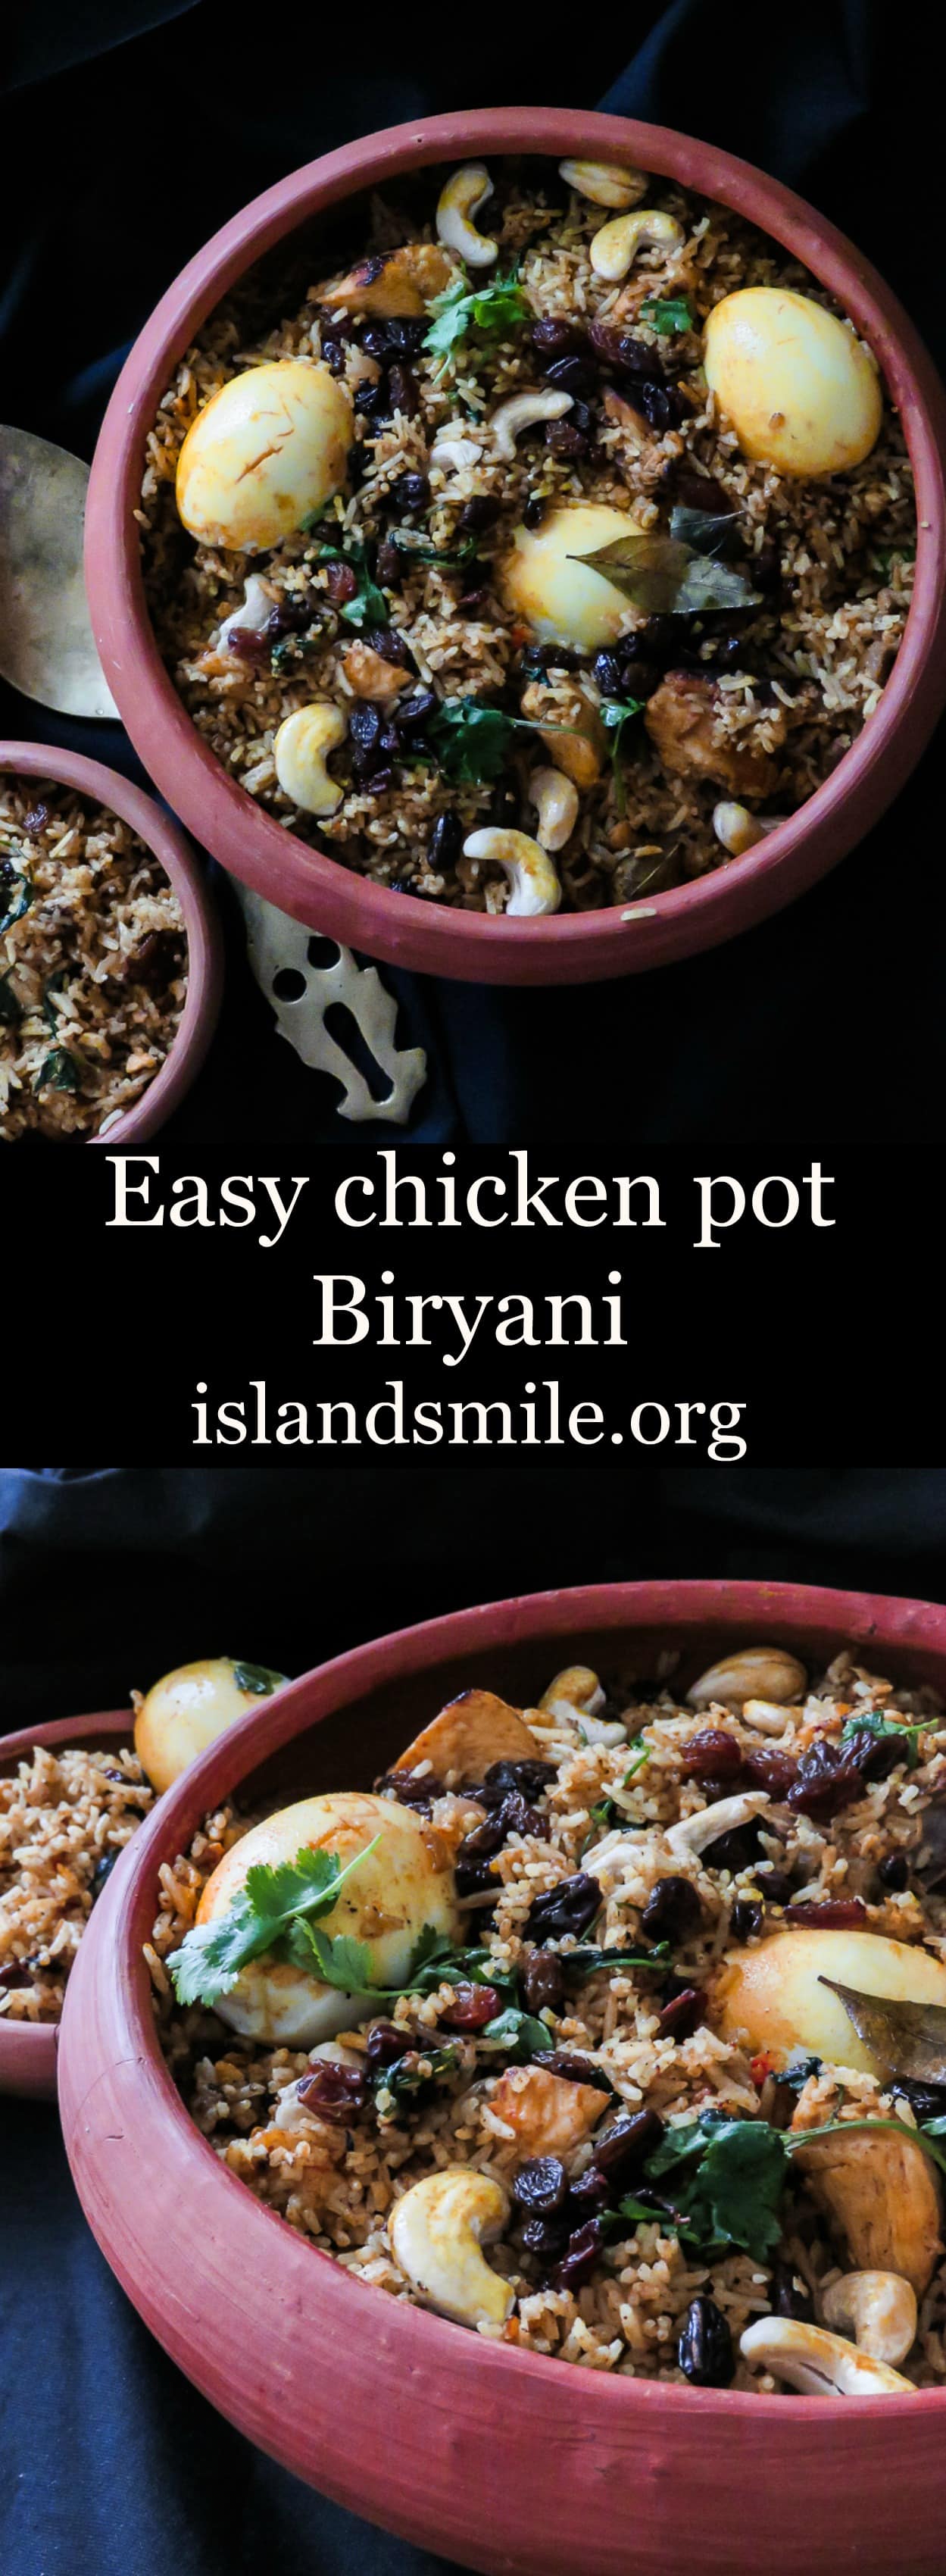
How to make an Easy Chicken Pot Biryani.
Please make sure to read the recipe instructions carefully to avoid mistakes.
Easy chicken pot Biryani.
NOTES- Problems that you might come across making this easy chicken pot Biryani the first time.
1/I’m not sure the chicken is cooked through what should I do?
The low fire helps the chicken to cook without the rice burning but if you are still unsure about the process, once you take the marinated chicken off the refrigerator, leave it out to reach room temperature and cook the meat on low fire for 15 minutes and then use it on the layering process.
2/ What should I do if the Biryani looks dry?
Sometimes you might find the Biryani too dry, should this happen, pour a bit of ghee or oil while you are in the mixing process.
3/There’s not enough salt in the rice, what should I do?
Often when the cooking is done you might fight there isn’t enough salt in the rice to enhance the other flavors, sprinkle the salt on top and mix it, making sure it spreads evenly.
Ingredients
750g Basmathi rice
750g Chicken cut to medium size
2 large Onions finely sliced
2 tablespoons of ginger, garlic paste(Pulse equal amount of Ginger root and Garlic pods for this)
4 large Tomatoes chopped
A handful of Curry leaves
1 teaspoon Turmeric
1 and 1/2 teaspoons of Chilli powder
3 teaspoons of Coriander powder
3 teaspoons Cumin Powder
1 tablespoon of Garam masala
1 cup Yoghurt
1/2 a cup Coconut milk
3-5 pods of Cardamom
1 half Cinnamon stick
Salt to taste
1/2 a cup Cashew nuts as a garnish
1/2 a cup Raisins as a garnish
1 cup of Coriander leaves
4-5 hardboiled eggs
1 cup of fried Onions for garnish
Method
You will need a large bowl, frying pan and two large cooking pans, Use the largest pot to assemble the Biryani.
As mentioned above the Biryani is assembled in three stages.
So let’s follow the following four steps in order and assemble the Biryani.
Keep all the ingredient you need close to you so that process of making the flavored rice dish smoothly,
1. marinating the chicken
First, marinate the chicken with half a teaspoon of salt, one teaspoon each Coriander, Cumin and 1/2 a teaspoon of Chilli, Garam masala, mix with the chicken followed by a cup of Yoghurt and Coconut milk each.
Merge all the ingredients together, check for seasoning and refrigerate for 2 to 3 hours, try to marinade the chicken early so you can leave it for several hours, this will help the chicken to absorb more.
2. Cooking the rice.
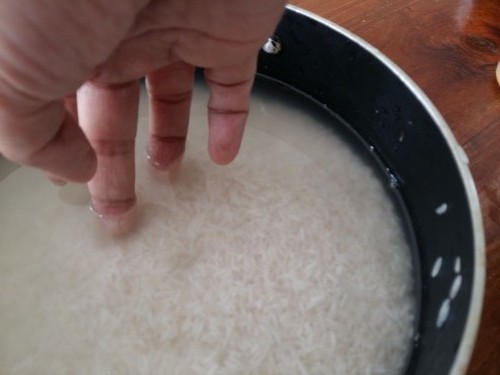
Wash the rice while making sure not to soak it too long, drain well, as we need the cooked grains to be almost raw.
Pour water into the pan, the amount of liquid should be less than usual, so the amount of water should just reach the first line on your middle finger(see above image).
Add salt to the rice and stir, keep in mind, the result of cooking the rice will result is almost raw.
Use a pan which has a tight lid, add the water and rice into the pan and cook over high heat the first 5 minutes.
Once the 5 minutes of cooking over high heat is over, reduce the heat and cook for a further 10-15 minutes less on low fire, once the water evaporates take the pan away from the stove.
Open the lid of the pan, use a fork to fluff the rice so they don’t stick together and leave the pan open when you check the rice grain, you’ll notice the middle is whiter than the surrounding of it, this is what we are looking for. Set aside.
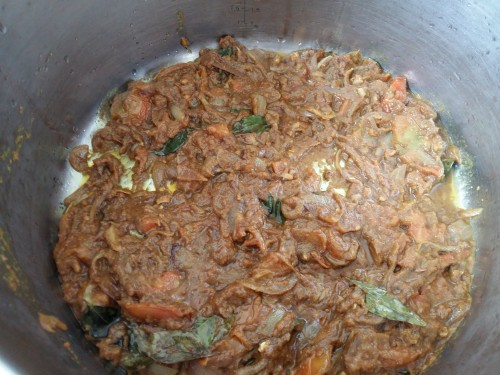
3. the frying of key ingredients
Place a pan over medium heat and pour in the oil, add the sliced Onions, once they start turning translucent, add the leftover spices Cumin, Coriander, chilli and Garam masala, followed by curry leaves, ginger-garlic paste, Cardamom, Cinnamon and sliced Tomatoes, fry until they turn into a liquid paste. during this process try to keep the heat low medium to avoid burning the ingredients too soon. Save any leftover Oil, you will need it when layering.
4. Assembling the chicken pot Biryani to cook.
Now that you have the rice, fried Onion paste and the marinated chicken ready, it’s time to bring them together.
Try to use a large, deep pan as the rice and chicken will be layered alternately and once cooked, you will need room in the pan to mix.
Separate the fried Onion paste into 3-4 portions.
Begin by placing the first portion of the Onion in the bottom of the pan, pour in the oil you fried the onions as well, follow it by adding a layer of marinated chicken and then rice. layer this way until you’ve finished the onion paste, chicken and rice. Make sure the layers are closely packed.
The top layer should be rice, cover with a tight-lipped lid and cook on low heat for 10-15 minutes, if you feel the rice needs a few more minutes, extend the cooking time. keep the fire on low-heat to avoid the bottom layer from burning.
Once the 15 minutes are done, remove the rice pan off the stove but leave the lid on so that the remaining heat cooks the rice,5-10 minutes.
While the rice is still warm, move on to the mixing which involves bringing all that cooked meat and spices to the surface and flavoring the rice. This takes patience and quite a bit of careful mixing as you don’t want to mash the rice.
Gently using a long-handled spoon, dig into the bottom layer and work on bringing it to the surface until the rice mixes with all the other ingredients and takes on the color of the spices.
Keep tasting, should you fill there isn’t Salt in the rice, keep sprinkling and mixing while tasting for the right amount of seasoning.
It will probably take you a few minutes to mix and combine all the bottom ingredients with the rice, then gently place the hard-boiled eggs within the rice.
Garnish with raisins, toasted Cashew nuts, and Coriander, as a further flavor enhancer add fried onions.
Made this recipe?
Please don’t forget to rate the recipe on the recipe card so other readers find it helpful and show me your recipe by tagging me #islandsmile178 on Instagram.

chicken pot Biryani.
Ingredients
- 750g Basmathi rice
- 750g Chicken cut to medium size
- 2 large Onions finely sliced
- 2 tablespoons of ginger, garlic paste(Pulse equal amount of Ginger root and Garlic pods for this)
- 4 large Tomatoes chopped
- A handful of Curry leaves
- 1 teaspoon Turmeric
- 1 and 1/2 teaspoons of Chilli powder
- 3 teaspoons of Coriander powder
- 3 teaspoons Cumin Powder
- 1 tablespoon of Garam masala
- 1 cup Yoghurt
- 1/2 a cup Coconut milk
- 3-5 pods of Cardamom
- 1 half Cinnamon stick
- Salt to taste
- 1/2 a cup Cashew nuts as a garnish
- 1/2 a cup Raisins as a garnish
- 1 cup of Coriander leaves
- 4-5 hardboiled eggs
- 1 cup of fried Onions for garnish
Instructions
You will need a large bowl, frying pan and two large cooking pans, Use the largest pot to assemble the Biryani.
As mentioned above the Biryani is assembled in three stages.
So let’s follow the following four steps in order and assemble the Biryani.
Keep all the ingredient you need close to you so that process of making the flavored rice dish smoothly,
1. marinating the chicken
First, marinate the chicken with half a teaspoon of salt, one teaspoon each Coriander, Cumin and 1/2 a teaspoon of Chilli, Garam masala, mix with the chicken followed by a cup of Yoghurt and Coconut milk each.
Merge all the ingredients together, check for seasoning and refrigerate for 2 to 3 hours, try to marinade the chicken early so you can leave it for several hours, this will help the chicken to absorb more.
2. Cooking the rice.
Wash the rice while making sure not to soak it too long, drain well, as we need the cooked grains to be almost raw.
Pour water into the pan, the amount of liquid should be less than usual, so the amount of water should just reach the first line on your middle finger(see above image).
Add salt to the rice and stir, keep in mind, the result of cooking the rice will result is almost raw.
Use a pan which has a tight lid, add the water and rice into the pan and cook over high heat the first 5 minutes.
Once the 5 minutes of cooking over high heat is over, reduce the heat and cook for a further 10-15 minutes less on low fire, once the water evaporates take the pan away from the stove.
Open the lid of the pan, use a fork to fluff the rice so they don’t stick together and leave the pan open when you check the rice grain, you’ll notice the middle is whiter than the surrounding of it, this is what we are looking for. Set aside.
3. the frying of key ingredients
Place a pan over medium heat and pour in the oil, add the sliced Onions, once they start turning translucent, add the leftover spices Cumin, Coriander, chilli and Garam masala, followed by curry leaves, ginger-garlic paste, Cardamom, Cinnamon and sliced Tomatoes, fry until they turn into a liquid paste. during this process try to keep the heat low medium to avoid burning the ingredients too soon. Save any leftover Oil, you will need it when layering.
4. Assembling the chicken pot Biryani to cook.
Now that you have the rice, fried Onion paste and the marinated chicken ready, it’s time to bring them together.
Try to use a large, deep pan as the rice and chicken will be layered alternately and once cooked, you will need room in the pan to mix.
Separate the fried Onion paste into 3-4 portions.
Begin by placing the first portion of the Onion in the bottom of the pan, pour in the oil you fried the onions as well, follow it by adding a layer of marinated chicken and then rice. layer this way until you’ve finished the onion paste, chicken and rice. Make sure the layers are closely packed.
The top layer should be rice, cover with a tight-lipped lid and cook on low heat for 10-15 minutes, if you feel the rice needs a few more minutes, extend the cooking time. keep the fire on low-heat to avoid the bottom layer from burning.
Once the 15 minutes are done, remove the rice pan off the stove but leave the lid on so that the remaining heat cooks the rice,5-10 minutes.
While the rice is still warm, move on to the mixing which involves bringing all that cooked meat and spices to the surface and flavoring the rice. This takes patience and quite a bit of careful mixing as you don’t want to mash the rice.
Gently using a long-handled spoon, dig into the bottom layer and work on bringing it to the surface until the rice mixes with all the other ingredients and takes on the color of the spices.
Keep tasting, should you fill there isn’t Salt in the rice, keep sprinkling and mixing while tasting for the right amount of seasoning.
It will probably take you a few minutes to mix and combine all the bottom ingredients with the rice, then gently place the hard-boiled eggs within the rice.
Garnish with raisins, toasted Cashew nuts, and Coriander, as a further flavor enhancer add fried onions.
Each recipe on this blog has been written with great care and love to the best of my ability with you in mind.
It’s free and on the blog, for you to try anytime.
All I ask is that you do not save it on any apps, recipe boxes or online groups which will affect me as a food blogger and the growth of this blog. I would appreciate if you only share the link rather than the full recipe.
All images and text on this website are protected by copyright.
Rafeeda @ The Big Sweet Tooth
Tuesday 12th of January 2016
My family loves biriyani any time... and your version looks truly delectable... It is amazing how each family has their versions of biriyanis... Looks truly delicious!
jehan
Tuesday 12th of January 2016
Thank you Rafeeda, I think we have to thank our moms for that. I'm sure your version of biryani is the same. Appreciate your lovely comment.
fattymccupcakes
Tuesday 12th of January 2016
Looks delicious!!!
jehan
Tuesday 12th of January 2016
☺thanks
Fathima Zamruth Packeer Ally
Monday 11th of January 2016
Love the recipe!
jehan
Monday 11th of January 2016
Happy new year!! and Thank you so much.