These easy chocolate crumb bars are made with sweetened condensed milk, a thick shortbread crust and two layers of chocolate.
The shortbread layer gives the two gooey, melting chocolate a firm bottom and the extra crumble on top of the easy chocolate filling makes these quick dessert snacks a dream to bite into.
Need I say more?
If you are looking for a quick dessert made with condensed milk and chocolate to replace your brownies then give these dessert bars a try.
I promise they won’t disappoint you.

Serving the chocolate crumb bars.
- They make the ideal snack or dessert gift to take to friends and families.
- You can make these shortbread chocolate bars a day ahead to take on picnics or a trip to the beach.
- Place them in brownie liners and serve them at birthday parties.
- These crumble bars make a quick dessert to satisfy your sweet tooth cravings.
- The chocolate crumble bars are also great for school bake sales as you need only 5 staple baking ingredients.
Making these chocolate crumb bars for the family.
I’ve made these a couple of times for my family as well as giveaways. They are always a hit.
The gooey chocolate and the crumble make them rich and over the top chocolate layers for anyone who loves loads of chocolate in their desserts.
If you are living in a humid hot country, just make sure to chill them for a few extra hours before wrapping them up as baked gifts.
Also, these are really sweet and decadent, I recommend cutting them into smaller portions.
It’s gooey and a messy eat that makes a fun sweet snack for everyone.
Save the recipe to your favourite Pinterest board!

Utensils and appliances needed.
- 9″ x 9″ square baking pan.
- Baking paper/parchment paper.
- A pastry brush.
- Knife.
- Platter or tray to cool and cut the bars.
More condensed milk desserts.
- Condensed milk lemon bars with a crust.
- condensed milk baked caramel pudding.
- Fluffy pineapple pudding with condensed milk
- Condensed milk fudge(milk toffee)
- Easy condensed milk hot fudge sauce (chocolate).
- No-bake chocolate biscuit cake with condensed milk
Storage- let cool, cut into preferred size and store them in an airtight container. refrigerate.
Serving- remove from fridge and let it slightly reach room temperature before serving. ext
RECIPE DIFFICULTY- EASY
How to make chocolate crumb bars
The ingredients mentioned below use standard measuring cups and spoons.
Ingredients to make chocolate crumb bars
For the crust and crumb
3 and 1/2 cups of flour
1 and 1/2 cups of butter
2/3 cup granulated sugar
1/4 teaspoon salt
To make the chocolate filling
14oz can condensed milk(small)
1 teaspoon of vanilla essence
310g of cooking chocolate(substitute with two cups of semi sweet dark
chocolate chips)
Method
Have all the ingredients at room temperature(eggs, butter).
Line the 9″ square pan with baking paper.
Dab a little butter around the pan to secure the paper to the pan.
Add the sifted flour, butter, sugar and salt.
Lightly mix with your hand to combine all the ingredients until you have a crumbly mixture.
Avoid using movements that you would use to knead a pastry dough.
You can also use your food processor to combine and make the crumble.
Make sure to pulse a few times to obtain the crumbly mixture.
Separating the crumble mixture.
Divide the crumble in half.
I have divided the crumble equally for both the bottom layer and the top layer.
This gives me a thick crumble on top and bottom as well.
If you want less crumble on top then separate 1 cup of crumble for the top and use the rest to cover the bottom of the baking pan.
Transfer one half of the crumble to the baking pan and cover the bottom with it.

Baking the bottom layer.
Preheat oven to 170C.
While the oven preheats, press the crumble into the baking pan and cover the bottom with an even layer.

Bake for 12 minutes or until firm and golden brown.

Chocolate chips or cooking chocolate slab?
You can substitute both in exchange for the other at any time.
I have used both cooking chocolate and chocolate chips to make the filling and sprinkle them over the crumb.
If you are using a cooking chocolate slab, weigh the recommended amount and chop it into smaller pieces and then divide it in half.
Making the condensed milk chocolate filling
Pour the condensed milk into a large microwavable bowl(preferably a glass bowl), and add half of the chocolate and vanilla into the bowl.

Microwave for 3 minutes in 1-minute bursts to avoid spillover.
Carefully remove the bowl from the microwave.
Place it on a dry surface and mix for at least 60 seconds to combine and smooth the chocolate filling mixture.

Pour the chocolate filling onto the baked crust.

Preheat oven to 170C
Add the rest of the crumbs over the chocolate filling and then the rest of the chopped chocolate bits/chocolate chips.

Place the chocolate crumb pan and bake for 25-30 minutes or until the crumb layer on top turns golden.
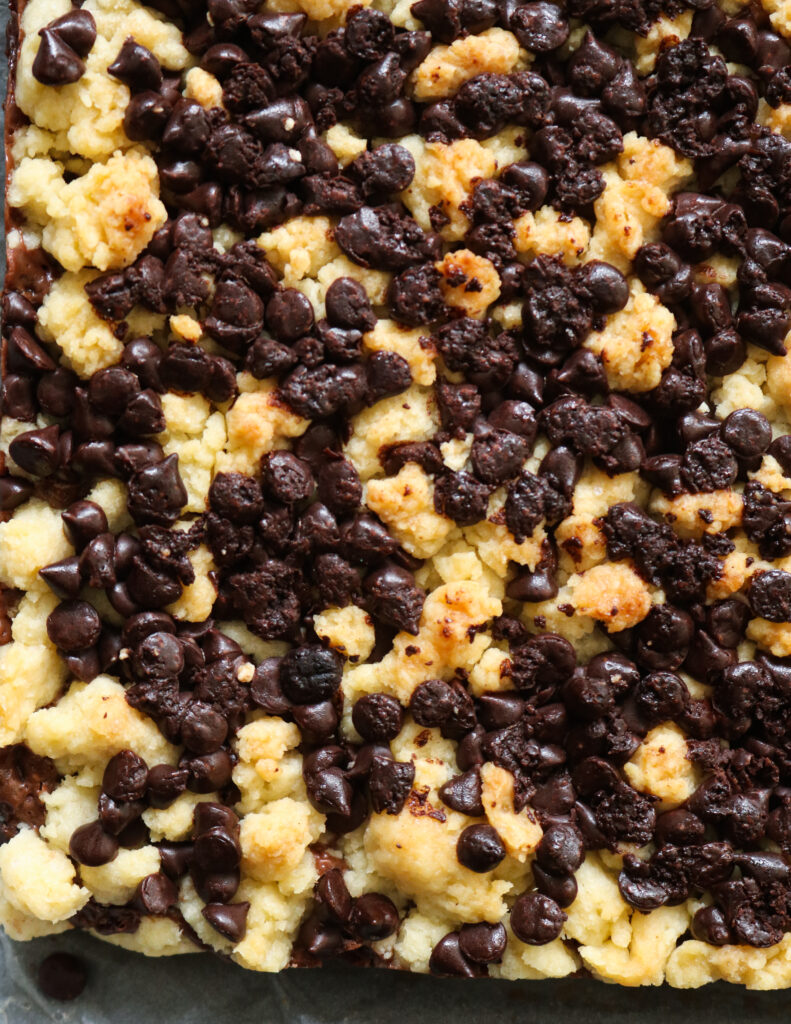
Made using chocolate chips. 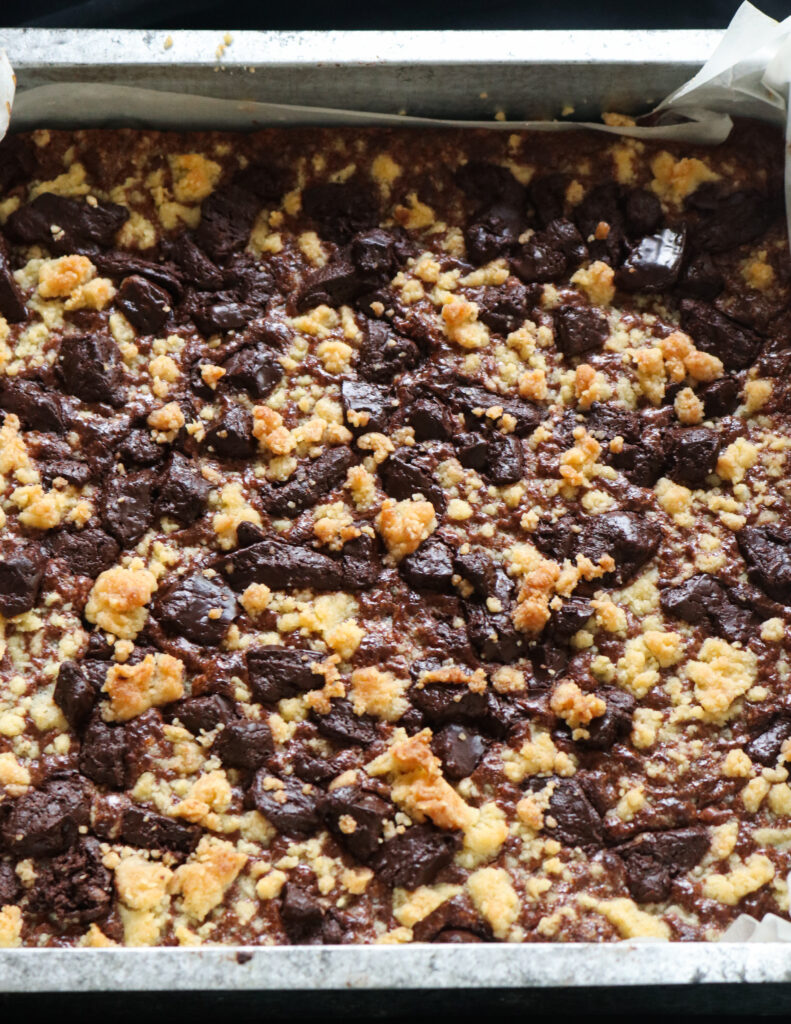
Made using chopped cooking chocolate slab.
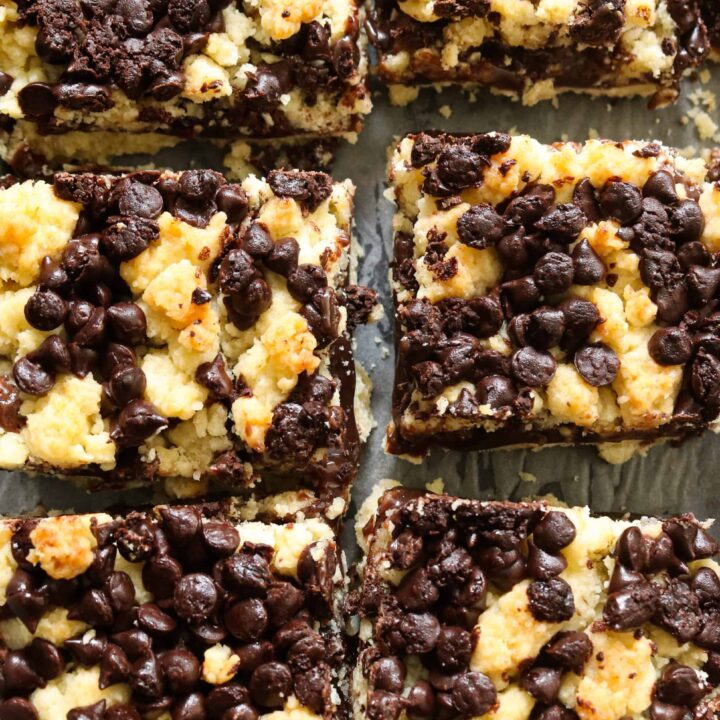
Let the chocolate crumb bars cool and then refrigerate for at least 2-3 hours before cutting them into squares.
JOIN ME ON ISLANDSMILE YOUTUBE CHANNEL
LOVE SEAFOOD? COME JOIN ME ON MY NEW SEAFOOD BLOG.
Condensed milk chocolate crumb bars.
These easy chocolate crumb bars are made with sweetened condensed milk, a thick shortbread crust and two layers of chocolate.
The shortbread layer gives the two gooey, melting chocolate a firm bottom and the extra crumble on top of the easy chocolate filling makes these quick dessert snacks a dream to bite into.
Ingredients
- Ingredients to make chocolate crumb bars
For the crust and crumb
- 3 and 1/2 cups of flour
- 1 and 1/2 cups of butter
- 2/3 cup granulated sugar
- 1/4 teaspoon salt
To make the chocolate filling
- 14oz can condensed milk
- 1 teaspoon of vanilla essence
- 310g of cooking chocolate(substitute with two cups of semi sweet dark chocolate chips)
Instructions
Have all the ingredients at room temperature(eggs, butter).
Line the 9″ square pan with baking paper.
Dab a little butter around the pan to secure the paper to the pan.
Add the sifted flour, butter, sugar and salt.
Lightly mix with your hand to combine all the ingredients until you have a crumbly mixture.
Avoid using movements that you would use to knead a pastry dough.
You can also use your food processor to combine and make the crumble.
Make sure to pulse a few times to obtain the crumbly mixture.
Separating the crumble mixture.
Divide the crumble in half.
I have divided the crumble equally for both the bottom layer and the top layer.
This gives me a thick crumble on top and bottom as well.
If you want less crumble on top then separate 1 cup of crumble for the top and use the rest to cover the bottom of the baking pan.
Transfer one half of the crumble to the baking pan and cover the bottom with it.
Baking the bottom layer.
Preheat oven to 170C.
While the oven preheats, press the crumble into the baking pan and cover the bottom with an even layer.
Bake for 12 minutes or until firm and golden brown.
Chocolate chips or cooking chocolate slab?
You can substitute both in exchange for the other at any time.
I have used both cooking chocolate and chocolate chips to make the filling and sprinkle them over the crumb.
If you are using a cooking chocolate slab, weigh the recommended amount and chop it into smaller pieces and then divide it in half.
Making the condensed milk chocolate filling
Pour the condensed milk into a large microwavable bowl(preferably a glass bowl), and add half of the chocolate and vanilla into the bowl.
Microwave for 3 minutes in 1-minute bursts to avoid spillover.
Carefully remove the bowl from the microwave.
Place it on a dry surface and mix for at least 60 seconds to combine and smooth the chocolate filling mixture.
Pour the chocolate filling onto the baked crust.
Preheat oven to 170C
Add the rest of the crumbs over the chocolate filling and then the rest of the chopped chocolate bits/chocolate chips.
Place the chocolate crumb pan and bake for 25-30 minutes or until the crumb layer on top turns golden.
Let the chocolate crumb bars cool and then refrigerate for at least 2-3 hours before cutting them into squares.
Recommended Products
As an Amazon Associate and member of other affiliate programs, I earn from qualifying purchases.
-
 Nestle Toll House Semi-sweet Chocolate Morsels 12oz (Pack of 3)
 -
 DOWAN 4 oz Ramekins - Ramekins for Creme Brulee Porcelain Ramekins Oven Safe, Classic Style Ramekins for Baking Souffle Ramekins Bowls, Set of 6, White
 -
 Duralex LYS Mixing Bowl Set, 10 Piece, clear
 -
 Secura 60-Minute Visual Timer, Classroom Countdown Clock, Silent Timer for Kids and Adults, Time Management Tool for Teaching (Black)
 -
 Fullstar Vegetable Chopper - Spiralizer Vegetable Slicer - Onion Chopper with Container - Pro Food Chopper - Black Slicer Dicer Cutter - 4 Blades
 -
 WISELIFE Kitchen Mat and Rugs Cushioned Anti-Fatigue Kitchen mats ,17.3"x 28",Non Slip Waterproof Kitchen Mats and Rugs Ergonomic Comfort Mat for Kitchen, Floor Home, Office, Sink, Laundry , Grey
 -
 Kitchen Shears, iBayam Kitchen Scissors Heavy Duty Meat Scissors Poultry Shears, Dishwasher Safe Food Cooking Scissors All Purpose Stainless Steel Utility Scissors, 2-Pack (Black Red, Black Gray)
 -
 OXO Good Grips 3-Piece Wooden Spoon Set
 -
 EZ Off Jar Opener - Under Cabinet Jar Lid & Bottle Opener - Opens Any Size Jar - Great for Arthritis - Perfect for Seniors & Weak Hands
 -
 KIZEN Digital Meat Thermometer with Probe - Waterproof, Kitchen Instant Read Food Thermometer for Cooking, Baking, Liquids, Candy, Grilling BBQ & Air Fryer - Black/White
 -
 SWEEJAR Ceramic Baking Dish, Rectangular Small Baking Pan with Double Handles, 22OZ for Cooking, Brownie, Kitchen, 6.5 x 4.9 x 1.8 Inches(Navy)
 -
 OXO Good Grips Swivel Peeler
Nutrition Information:
Yield: 16 Serving Size: 1Amount Per Serving: Calories: 346Total Fat: 15gSaturated Fat: 9gTrans Fat: 0gUnsaturated Fat: 4gCholesterol: 31mgSodium: 138mgCarbohydrates: 48gFiber: 1gSugar: 37gProtein: 6g
Nutrition facts are an estimate and not guaranteed to be accurate. Please see a registered dietitian for special diet advice.
Each recipe on this blog has been written with great care and love to the best of my ability with you in mind.
It’s free and on the blog, for you to try anytime.
All I ask is that you do not save it on any apps, recipe boxes or online groups which will affect me as a food blogger and the growth of this blog.
I would appreciate it if you only share the link rather than the full recipe.
All images and text on this website are protected by copyright.
Nancy
Wednesday 4th of May 2022
In your section for the equipment needed for the crumb bars you say you will need a pastry brush. I just bought one because of this, but your directions, which are generally very detailed, make no mention of how to use it or when to use it. I do not have a food processor. Please answer so I can get started making these yummy sounding bars. I think I wrote my comment in the wrong box. Sorry. Can you still answer me
jehan
Thursday 5th of May 2022
Hi Nancy, Apologies for the late reply. The food processor is not necessary to make the crumble, I have given the option of a food processor option to make a quicker crumble. The pastry brush is also an option to use instead of your fingers to dab the butter and secures the baking paper to the pan. I feel guilty that you bought it for this purpose but I guarantee you'll need the brush for future baking projects. Hope this helps, regards, J