Garlic ginger paste recipe, homemade and stored in your refrigerator to be used in your cooking.
With just five steps, you can have an aromatic and flavour-inducing, fresh garlic ginger paste ready.
Ginger and garlic are the most essential ingredients used for cooking curries, especially chicken, beef and seafood dishes.
save the recipe to Pinterest.
- every curry you cook needs a generous amount of ginger -garlic paste. Having a homemade version in your refrigerator makes it easy and convenient.")
Tips to make garlic ginger paste.
- Use an air-tight container to store the paste.
- Make sure the container you use is dry.
- Preferably a glass container would be ideal.
- Always use a dry spoon and avoid any kind of moisture getting into the paste.
- Once you’ve used immediately store in the refrigerator and make sure it is stored in the coldest part of the fridge.
- You can also freeze excess ginger-garlic paste.
FAQ: fresh garlic ginger paste
- Why you should make your own garlic ginger paste.
You make use of all the ginger root and garlic pods you buy with zero waste
It takes the work of always pulling out the mortar and pestle to make a few tablespoons of the paste.
It’s easy enough that you can go into your kitchen now and just make a bottle of it in 20 minutes.
- Can I make the garlic and ginger paste separately?
yes, some of you might find this convenient as you can use this for almost any type of cuisine.
Make the ginger paste and garlic paste separately using the same instructions given below and store them in two separate bottles.
This way, you can use them separately or if you ever need a spoon of ginger-garlic paste all you have to do is combine these two ingredients.
- How can I make a garlic ginger paste without a blender?
Sometimes you just need a tablespoon of the paste, in these instances, you can easily make a coarse paste by using a grater with smaller holes to grate 2 garlic pods and a 2-inch piece of fresh ginger.
- How long will the ginger-garlic paste keep fresh and can I make it for a month?
You can make the paste for a month.
Depending on how you store it, the strength and aroma of the paste will reduce with time and there is a risk of spoiling due to air and moisture.
I would advise you to make the paste for a week and start all over again.
Again I would suggest only making a week’s or 2 weeks’ worth of garlic ginger paste as a safety precaution.
Kitchen utensils and appliances needed.
- Washed, air-dried glass jar with a tight lid
- food processor.
easy garlic ginger paste recipes.
No curry powder Sri Lankan chilli beef curry.
creamy fragrant Butter chicken
RECIPE DIFFICULTY-EASY
Ingredients TO MAKE GINGER GARLIC PASTE
Ingredients mentioned below use standard measuring cups and spoons.
100g ginger
100g garlic
A pinch of salt(1/8 teaspoon)
2 tablespoon of canola oil or any sunflower oil(you will need a neutral flavored oil)
MAKING GARLIC GINGER PASTE.
Please make sure to read the recipe instructions carefully to avoid mistakes.
Wash and thoroughly dry the ginger and garlic, and remove any remaining moisture, especially on the ginger as it tends to absorb water more than garlic.
Pat dry. set them aside for 10-15 minutes to dry.
Roughly scrape off the skin of the ginger and chop it into manageable sizes, separate the cloves and peel the skin of the garlic.
- every curry you cook needs a generous amount of ginger -garlic paste. Having a homemade version in your refrigerator makes it easy and convenient.")
Add the ginger, garlic, salt into the food processor and roughly blitz the ingredients for a few seconds.
- every curry you cook needs a generous amount of ginger -garlic paste. Having a homemade version in your refrigerator makes it easy and convenient.")
Pour in a tablespoon of oil, scrape the sides and blitz once more for five seconds, pour in another tablespoon of oil or gradually add oil for a smoother blend, making sure not to add too much of the oil.

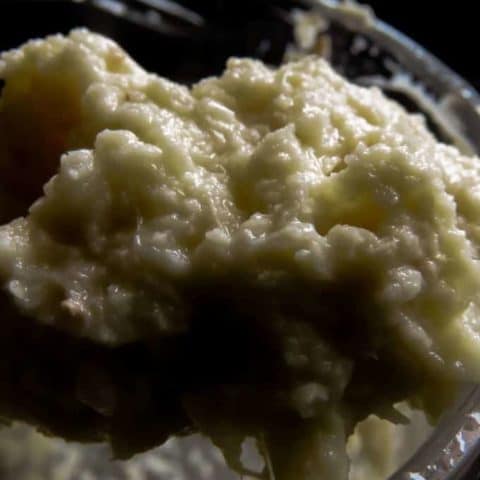
Once the ginger-garlic paste is done, add it to the dry jar and twist the lid tight.
Refrigerate the jar where it’s the coldest and always use a dry spoon when you need to use the paste immediately refrigerate the jar for a longer shelf life.
JOIN ME ON ISLANDSMILE YOUTUBE CHANNEL
visit the SEAFOOD BLOG
Homemade ginger garlic paste in 5-steps(diy recipe).
HOW TO MAKE GINGER-GARLIC PASTE(DIY RECIPE)- EVERY CURRY YOU COOK NEEDS A GENEROUS AMOUNT OF GINGER -GARLIC PASTE.
HAVING A HOMEMADE VERSION IN YOUR REFRIGERATOR MAKES IT EASY AND CONVENIENT.
Ingredients
- 100g of ginger
- 100g of garlic
- A pinch of salt(1/8 teaspoon)
- 2 tablespoon of canola oil or any sunflower oil(you will need a neutral flavored oil)
Instructions
- Wash and thoroughly dry the ginger and garlic, remove any remaining moisture, especially on the ginger as it tends to absorb water more than garlic. pat dry. set them aside for 10-15 minutes to dry.
- Roughly scrape off the skin of the ginger and chop them into manageable size, separate the cloves and peel the skin of the garlic.
- Add the ginger, garlic, salt into the food processor and roughly blitz the ingredients for a few seconds.
- Pour in a tablespoon of oil, scrape the sides and blitz once more for five seconds, pour in another tablespoon of oil or gradually add oil for a smoother blend, make sure not to add too much of the oil.
- Once the ginger-garlic paste is done, add it into the dry jar and twist the lid tight. refrigerate the jar where it’s the coldest and always use a dry spoon when you need to use the paste and immediately refrigerate the jar for a longer shelf life.
Each recipe on this blog has been written with great care and love to the best of my ability with you in mind.
It’s free and on the blog, for you to try anytime.
All I ask is that you do not save it on any apps, recipe boxes or online groups which will affect me as a food blogger and the growth of this blog.
I would appreciate it if you only share the link rather than the full recipe.
All images and text on this website are protected by copyright.
Alan Seizys
Wednesday 19th of September 2018
Hello from Chicago! I love your recipes. Be well and keep on posting. Alan
jehan
Wednesday 19th of September 2018
And blessing from Sri Lanka Thank you. I will.keep on posting recipes as long as I have reader's like you letting me know they care. Regards Jehan.